- Home
- How to Grow Vegetables
- How to Grow Green Beans
How to Grow Green Beans: The Complete Guide to Bush and Pole Beans
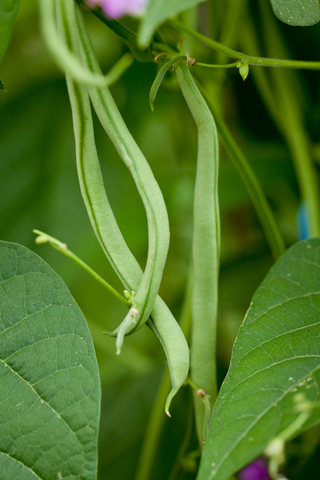
Learning how to grow green beans is one of the most satisfying and productive choices any vegetable gardener can make.
Green beans are easy, fast, enormously productive, and a staple in the kitchen.
They are among the best vegetables to grow at home because the quality difference between fresh-picked beans from the garden and anything sold in a supermarket is dramatic.
The flavor, the snap, and the tenderness of beans eaten within hours of picking is something entirely different from beans that have traveled hundreds of miles in refrigerated trucks.
Green beans are also one of the most forgiving crops a beginner can choose.
They are direct sown, germinate quickly, grow vigorously, produce abundantly, and - as an added benefit - fix nitrogen from the air into the soil, improving the bed for whatever crop follows them.
Growing green beans is often the first vegetable gardening success a beginner has, and the experience builds the confidence to tackle everything else.
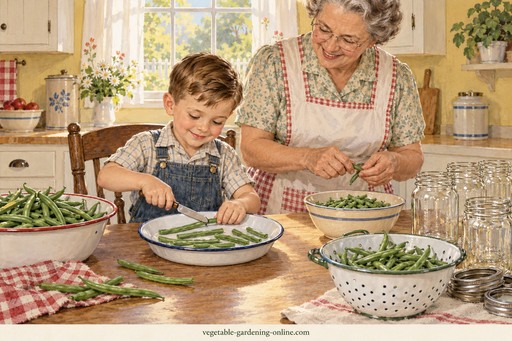 Helping to prepare green beans for canning; it wasn't much fun, but our little neighbor boy helped out one year.
One of my jobs as a child, was to help pick the green beans from the garden, and prepare them for pressure canning. That meant cutting both ends off of each bean, and cutting them into about 1 inch pieces. It was time-consuming, and rather tedious work. All the while, the pressure canner was hissing in the background, which I found unnerving. My mother always kept a close watch on the pressure gauge on the canner.
We canned at least 50 quarts of green beans each summer. It took several days, and was not something that my sisters and brother and I looked forward to! But Mom sometimes rewarded us with a trip to the river to go swimming, or maybe a trip to Dairy Queen for a treat when we were finished.
One year a young neighbor boy named Danny, helped us prepare the green beans for canning. He was about 5 years old. He cut his green beans extra long to save time. For many years after, whenever we encountered an extra long green bean on our plate, we blamed it on Danny!
- Bush Beans vs. Pole Beans
- Choosing Green Bean Varieties
- When and Where to Plant
- Soil Preparation
- How to Plant Green Beans
- Watering and Feeding
- How to Harvest Green Beans
- Succession Planting for Continuous Harvest
- Common Problems and Solutions
- Companion Planting
- Growing in Containers
- Preserving, Freezing, and Canning
- Frequently Asked Questions
Bush Beans vs. Pole Beans: Which Should You Grow?
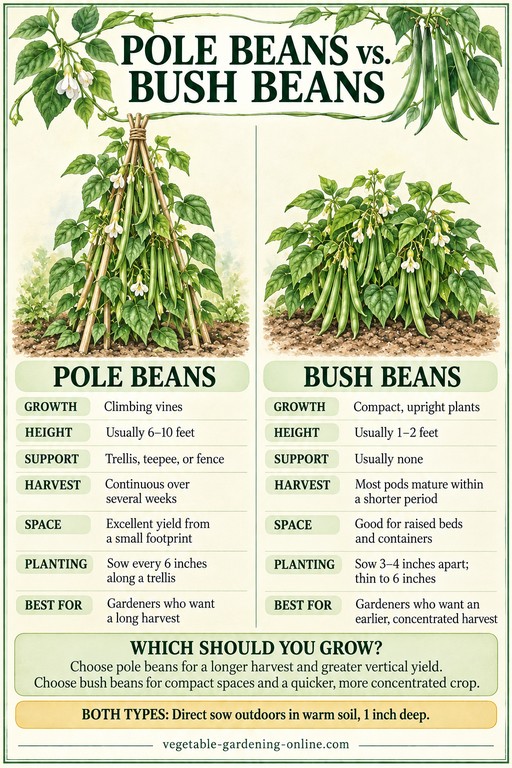 It depends on your garden size and preferences which type of green beans will be best to grow.
The most important choice when learning how to grow green beans is whether to grow bush beans or pole beans.
Both types produce excellent harvests, but they have very different growth habits, space requirements, and seasonal rhythms. Understanding the difference helps you choose the right type for your garden and your kitchen needs.
Bush beans are compact, self-supporting plants that grow to about two feet tall without any staking or trellis support.
They are the most popular choice for home gardeners learning how to grow green beans because they are simple, fast, and highly productive.
Bush beans tend to produce their entire harvest within two to three weeks - a large flush of pods all at once that is ideal for preserving, canning, or freezing.
The concentrated harvest window is both a strength and a limitation: plan for succession planting every three to four weeks if you want a continuous fresh supply throughout the season.
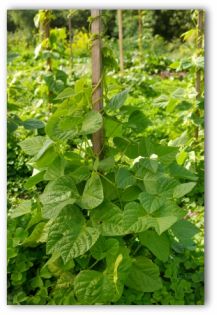
Pole beans are climbing vines that reach six to ten feet tall and need a sturdy support structure - a trellis, a fence, or a teepee of bamboo canes.
They take slightly longer to start producing than bush beans but once they begin, they produce continuously for the entire season right up to frost.
This extended harvest period makes pole beans excellent for gardeners who want fresh beans regularly over a long period rather than a concentrated all-at-once harvest.
Pole beans are also more productive per plant than bush types over the whole season and generally produce better quality, more tender pods.
A practical answer for most home gardeners is to grow some of both.
Bush beans for an early concentrated harvest and succession planting through summer.
Pole beans for the long continuous harvest through late summer and fall.
Together they provide fresh green beans from early summer until the first frost.
Bush beans vs. pole beans comparison
| Feature | Bush Beans | Pole Beans |
|---|---|---|
| Height | 18-24 inches; self-supporting | 6-10 feet; need trellis or support |
| Support needed | None | Sturdy trellis or teepee essential |
| Days to harvest | 50-55 days | 60-70 days |
| Harvest period | Concentrated 2-3 week flush | Continuous all season until frost |
| Total yield per plant | Good but limited season | Higher over the full season |
| Space needed | More ground area per pound of beans | Less ground space; grows vertically |
| Best use | Canning; preserving; large batch harvest | Fresh eating; continuous harvest |
| Succession planting | Essential for continuous harvest | Not needed; plants produce all season |
Choosing Green Bean Varieties

Green beans come in far more variety than the single green type most people are familiar with from the supermarket.
When growing green beans at home you have access to a wonderful range of colors, sizes, and flavors - from classic green snap beans to yellow wax beans, flat Italian Romano types, tender French filet beans, and dramatic purple varieties that turn green when cooked.
For beginners learning how to grow green beans for the first time, a reliable, widely available bush snap bean variety is the easiest starting point.
Blue Lake 274 is the most popular home garden green bean in America - it produces straight, tender, stringless pods with excellent flavor and very consistent quality.
Provider is another outstanding beginner choice, particularly valued for its ability to germinate and produce well even in cooler or less-than-ideal conditions - making it the most reliable option for northern gardens or cool spring sowing.
French filet beans - also called haricots verts - are worth growing once you have mastered the basics of how to grow green beans.
They produce extremely slender, tender pods with exceptional flavor that is considered by many to be superior to standard snap beans for fresh eating.
They require more frequent harvesting because the pods are best when very young and slender, but the flavor reward is significant.
Yellow wax beans are essentially green beans with yellow pods - the growing requirements are identical.
They are delicious, produce well, and add visual variety to the kitchen and garden.
Purple beans like Royal Burgundy are a fun and productive choice - the pods are a striking deep purple in the garden, which makes harvesting easier since they stand out clearly against the green foliage, and they turn standard green when cooked.
Best green bean varieties for home gardeners
| Variety | Type | Pod Color | Days to Harvest | Best For |
|---|---|---|---|---|
| Blue Lake 274 | Bush | Green | 55 days | Most popular home garden bean; excellent all-rounder |
| Provider | Bush | Green | 50 days | Best for cool soils; very reliable germination; beginners |
| Contender | Bush | Green | 49 days | Heat and disease tolerant; very productive |
| Royal Burgundy | Bush | Purple (turns green when cooked) | 51 days | Easy to spot at harvest; cold tolerant; excellent flavor |
| Golden Wax | Bush | Yellow | 54 days | Yellow wax bean; mild buttery flavor; beautiful in garden |
| Kentucky Wonder | Pole | Green | 65 days | Classic heirloom pole bean; excellent flavor; long season |
| Blue Lake Pole | Pole | Green | 60 days | Pole version of Blue Lake; continuous harvest all season |
| Rattlesnake Pole | Pole | Green with purple streaks | 73 days | Beautiful heirloom; heat tolerant; long productive season |
| Maxibel | Bush | Green (very slender) | 54 days | French filet bean; superior fresh flavor; gourmet cooking |
When and Where to Plant Green Beans

Getting timing right is essential when learning how to grow green beans.
Green beans are warm-season crops that are killed by frost and grow poorly in cold soil.
The most common mistake beginners make when growing green beans is planting too early into cold soil - the seeds rot rather than germinating, or they germinate very slowly and produce weak plants that never catch up to those planted at the right time.
The right time to plant green beans outdoors is after your last frost date has passed and soil temperature has reached at least 60 degrees Fahrenheit.
Most experienced green bean growers wait until the soil is closer to 65 to 70 degrees for the best germination rates and most vigorous early growth.
Use a soil thermometer to check at four to six inches depth before planting - it removes the guesswork entirely.
Use our free interactive zone finder to confirm your last frost date before planning your green bean sowing schedule.
For succession planting of bush beans - the best strategy for a continuous harvest - sow a new batch every three to four weeks from the last frost date through midsummer.
Each batch produces its concentrated harvest window, and staggered sowings provide steady fresh beans through the whole season.
The final sowing of bush beans should go in the ground at least fifty to sixty days before your first fall frost date.
Green beans need full sun - six to eight hours of direct sunlight daily.
They are not as sun-demanding as tomatoes and peppers but produce significantly better quality pods in full sun than in partial shade.
When learning how to grow green beans, choose the sunniest available bed position for your green beans, particularly for pole beans which will be in place for the entire season.
Soil Preparation for Growing Green Beans

Green beans are one of the least demanding vegetables in terms of soil fertility, which is one of the reasons they are so consistently recommended as a beginner crop.
Unlike tomatoes, peppers, and brassicas which are heavy feeders, green beans fix their own nitrogen from the air through bacteria in their root nodules.
This means they actually need less nitrogen fertilizer than most vegetables - and adding too much nitrogen when growing green beans produces lush, leafy plants with reduced pod production.
The ideal soil for growing green beans is moderately fertile, well-draining, and loose enough for the roots to penetrate easily.
A pH of 6.0 to 6.8 is ideal.
Work two inches of compost into the planting area before sowing - this provides adequate organic matter and slow-release nutrition without over-fertilizing.
When learning how to grow green beans, do not add high-nitrogen amendments like blood meal or fresh manure to the green bean bed - they are not needed and actively reduce pod production.
Raised beds are excellent for growing green beans because of their good drainage and loose, workable texture.
In a four-foot by four-foot raised bed, you can grow 24 to 32 bush bean plants following square foot gardening spacing - enough for a very productive harvest from a small footprint.
See our complete raised bed vegetable gardening guide for full advice on setting up and filling a raised bed.
One practical consideration when learning how to grow green beans is crop rotation.
Never plant green beans in the same bed where beans or peas were grown the previous year.
Rotating legumes to a new bed location each season prevents the buildup of soil-borne diseases that affect the bean family and maintains the nitrogen-fixing benefit across different bed locations.
How to Plant Green Beans
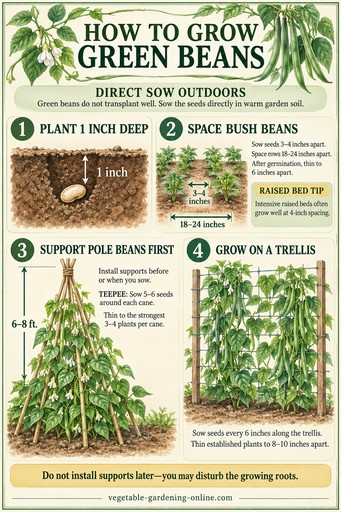
Green beans are always direct sown outdoors - never started indoors and transplanted.
Unlike most vegetables that benefit from an indoor head start, green beans grow so quickly that indoor starting provides no advantage and the root disturbance of transplanting actually sets them back.
When learning how to grow green beans, sow seeds directly in the prepared outdoor bed where they will grow to maturity.
Sow green bean seeds one inch deep.
Bush bean seeds should be spaced three to four inches apart in rows eighteen to twenty-four inches apart.
After germination, thin to six inches between plants for the best individual plant development - though many gardeners growing green beans in raised beds skip thinning and leave plants at four-inch spacing with good results in the intensive raised bed environment.
For pole beans, install the support structure before or at sowing - not after, when you risk disturbing roots.
A teepee of six to eight-foot bamboo canes tied at the top, with beans sown around the base of each cane, is the classic and most practical pole bean support.
A trellis of sturdy posts with horizontal wires or netting provides excellent support for rows of pole beans.
Sow five to six seeds around the base of each cane or every six inches along a trellis, and thin to the strongest three to four plants per cane or every eight to ten inches along a trellis once plants are established.
Green bean seeds have excellent germination rates when fresh - typically 90 percent or above.
They germinate in five to ten days in warm soil. In cool soil at 60 degrees they may take up to two weeks.
If seeds fail to emerge within three weeks, the most likely cause is cold soil, excessive moisture causing rot, or old seeds.
Replant with fresh seed once conditions improve.
Watering and Feeding Green Beans
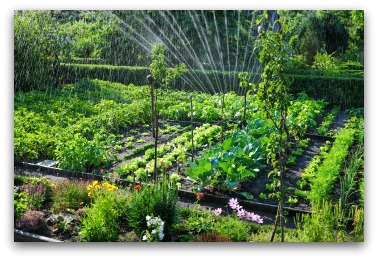
Green beans need consistent moisture throughout the growing season, with particular attention at two critical stages: germination and flowering.
At germination, the soil must remain consistently moist for the seeds to emerge successfully - allow the surface to dry out completely during germination and seed emergence rates drop dramatically.
During flowering and pod set, moisture stress causes flowers to drop before setting pods, directly reducing yield.
Water green beans to provide approximately one inch per week, either from rainfall or irrigation.
Deep watering twice per week is better than shallow daily watering - it encourages deeper root growth and makes plants more resilient during dry spells.
When learning how to grow green beans, water at the base of plants rather than overhead wherever possible, as wet bean foliage encourages the fungal diseases that commonly affect this crop.
Mulching around established bean plants is highly effective for maintaining the consistent moisture that growing green beans well requires.
A two-inch layer of straw or shredded leaves between plants reduces evaporation, moderates soil temperature, and keeps the soil surface from crusting between waterings.
Feeding is less important when learning how to grow green beans than for most other vegetables.
Because green beans fix their own nitrogen, they do not need the regular liquid feeding that tomatoes, cucumbers, and peppers require.
A single application of a low-nitrogen, balanced fertilizer at planting time is usually sufficient for the entire season in reasonably prepared soil. If plants appear pale or yellow between regular feedings, a light application of balanced fertilizer can be applied as a side dressing mid-season.
Avoid high-nitrogen feeds entirely when growing green beans - they produce excessive foliage at the expense of pod production.
How to Harvest Green Beans
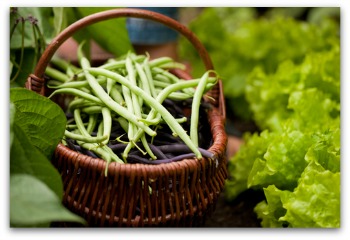
Knowing when and how to harvest is one of the most important skills in how to grow green beans for the best quality and longest production period.
The harvesting rule for green beans is exactly the same as for zucchini: pick frequently, pick young, and never let pods over-mature on the plant.
Harvest green beans when pods are firm, bright in color, and snap cleanly when bent - at this stage they are called snap beans for exactly this reason.
The pods should feel tender and the seeds inside should not yet be visibly bulging through the pod wall.
This is typically around pencil thickness for most standard varieties. French filet varieties should be harvested even younger - when pods are very slender, about the thickness of a matchstick.
Do not wait for pods to reach maximum size before harvesting.
Over-mature green beans develop tough, stringy pods with mealy, starchy seeds inside.
They also signal the plant to stop producing and redirect energy to seed development - a mature bean pod left on the plant can significantly slow or stop new pod production.
This is the most important harvesting principle in how to grow green beans productively.
Harvest green beans every two to three days during peak production.
Morning harvesting is considered the best time for green bean quality - sugar levels are highest and pods are fully hydrated from the cool night.
Wait until the dew has dried off the leaves, though. Picking beans while the foliage is wet spreads rust and other fungal diseases through the planting.
Grasp individual pods and snap or cut them from the plant, being careful not to tear branches or pull the whole plant.
Even more than with most crops, consistent harvesting is essential for pole beans to continue their long productive season.
Green bean harvest guide
| Bean Type | Ideal Harvest Size | Signs of Peak Quality | Signs of Overmaturity |
|---|---|---|---|
| Standard snap beans | 5-7 inches; pencil thickness | Firm; bright color; snaps cleanly | Seeds bulging; pod yellowing; tough and stringy |
| French filet beans | 3-4 inches; matchstick thin | Very slender; bright green; tender | Any thickening beyond matchstick; past peak immediately |
| Yellow wax beans | 5-6 inches; pencil thickness | Bright yellow; firm; snaps cleanly | Pale or greenish; tough skin; seeds visible |
| Purple beans | 5-6 inches; pencil thickness | Deep purple; firm; snaps cleanly | Dulling color; seeds bulging through pod |
| Romano / Italian flat | 5-7 inches; broad flat pod | Flat and tender; bright green | Bumpy (seeds showing); toughening; yellowing |
Succession Planting Green Beans
for a Continuous Harvest
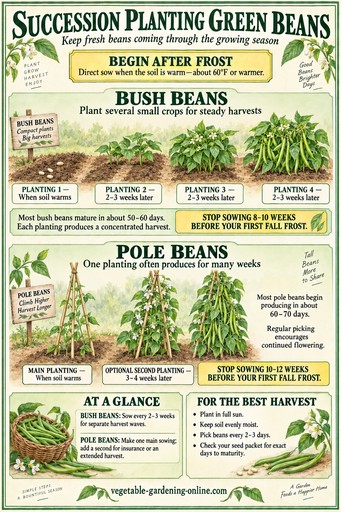 Succession planting guidance for green beans; both bush and climbing varieties.
Succession planting is the key strategy for getting the most from bush beans when growing green beans through the season.
Because bush beans produce their entire harvest in a concentrated two to three week window, a single planting gives you a feast followed by nothing.
When learning how to grow green beans, succession plantings three to four weeks apart transforms this limitation into an asset - continuous fresh beans from early summer through fall.
The practical succession planting schedule for growing green beans through the season is to make your first sowing at the last frost date, your second sowing three to four weeks later, your third sowing three to four weeks after that, and so on until your final sowing.
It should go in the ground at least fifty to sixty days before your first fall frost date to allow the beans time to mature before frost kills the plants.
With three or four staggered sowings you effectively have fresh bush beans available from early summer through early fall - with each batch providing its concentrated peak harvest when the previous batch is finishing.
This is one of the most productive and practical approaches in all of vegetable gardening, and green beans are the ideal crop for learning and practicing the succession planting method.
See our complete vegetable planting calendar for full succession planting advice across all common crops.
Common Green Bean Problems and Solutions
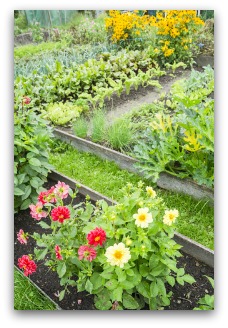
Green beans are among the easiest and most trouble-free vegetables to grow, but a few common problems are worth knowing about before you start. Most of them are straightforward to prevent or address.
Mexican bean beetle is the most significant insect pest for home gardeners growing green beans in much of the US. Adults and larvae feed on the undersides of leaves, leaving a characteristic lacy, skeletonized appearance.
Check the undersides of leaves regularly and remove egg clusters (yellow, oval eggs in neat rows) and larvae by hand. Neem oil spray is effective against populations that are not caught early.
Bean mosaic virus causes mottled, yellowing, distorted leaves and significantly reduces yield. It is spread by aphids, making aphid control a useful preventive measure when growing green beans.
Choose virus-resistant varieties where possible - many modern bush bean varieties list mosaic virus resistance on the seed packet. Remove and dispose of infected plants to prevent spread.
Beans not germinating is a very common problem when growing green beans for the first time.
The most common cause is cold soil - below 60 degrees, germination is slow and seeds may rot. Wait for warm soil before planting.
Other causes include seeds planted too deep (more than one inch), excessively wet soil causing rot, or old seed with low viability.
Use fresh seed from a reputable supplier and plant at the correct soil temperature for the most reliable germination when learning how to grow green beans.
Root rot causes bean plants to wilt and die, particularly in wet or waterlogged conditions.
Good drainage is the most effective prevention.
Raised beds with free-draining soil eliminate root rot almost entirely when growing green beans. Avoid over-watering and never plant beans in areas of the garden where water pools after rain.
Common green bean problems and solutions
| Problem | Most Likely Cause | Solution |
|---|---|---|
| Seeds not germinating | Cold soil; overwatering; old seeds | Wait for 60°F+ soil; use fresh seed; ensure good drainage |
| Plants wilting and dying | Root rot from waterlogged soil | Improve drainage; raised beds; avoid overwatering |
| Lacy, skeletonized leaves | Mexican bean beetle | Hand pick eggs and larvae; neem oil spray; row cover on young plants |
| Mottled, yellowing, distorted leaves | Bean mosaic virus (spread by aphids) | Remove infected plants; control aphids; choose resistant varieties |
| Plants flowering but no pods forming | Heat stress; temperatures above 90°F | Wait for temperatures to moderate; shade cloth; water consistently |
| Pods tough and stringy | Harvested too late; beans overmatured | Harvest more frequently; pick at pencil thickness before seeds swell |
| Aphids on growing tips | Aphid colonies | Jet of water; neem oil; insecticidal soap; encourage beneficial insects |
| Rust-colored spots on leaves | Bean rust (a fungus; warm, wet weather) | Water at the base; harvest only when foliage is dry; plant a rust-resistant variety next year |
Companion Planting for Green Beans
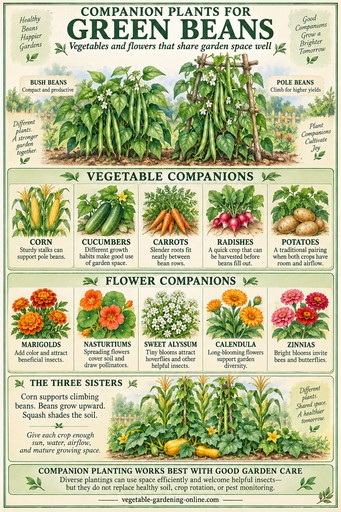 Chart of companion plants for growing green beans.
Green beans are one of the most valuable companion plants in the vegetable garden because of their nitrogen-fixing ability - the bacteria in their root nodules convert atmospheric nitrogen into plant-available form that benefits neighboring plants.
This makes learning how to grow green beans an excellent soil-building strategy as well as a food-producing one, and thoughtful placement of beans throughout the garden distributes this benefit widely.
The best companions when growing green beans include corn and squash - the Three Sisters combination that has been used by Native American gardeners for thousands of years.
Corn provides a natural climbing structure for pole beans; beans fix nitrogen that feeds the corn; squash shades the soil, suppressing weeds and retaining moisture for all three crops.
It is one of the most productive and beautiful companion planting systems available.
Carrots and green beans are excellent bed companions - the different root depths mean they do not compete, and carrots benefit from the nitrogen that beans fix.
Strawberries and beans are good neighbors.
Cucumber and squash planted near beans benefit from the nitrogen fixation.
Keep growing green beans away from garlic, onions, and all other alliums.
The root exudates of alliums interfere with the nitrogen-fixing bacteria in bean roots, reducing one of the primary soil benefits of growing beans.
Do not plant beans near shallots, leeks, or chives for the same reason.
Fennel should be kept well away from beans as it does with almost all vegetables.
See our complete companion planting chart for vegetables for the full guide to what grows well near green beans and what to keep separated.
Growing Green Beans in Containers
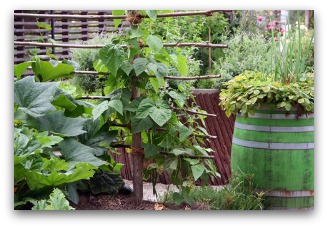
Growing green beans in containers is practical and productive - particularly for bush varieties that stay compact and self-supporting.
Container-grown green beans need consistent moisture and regular feeding, but they produce abundantly on a sunny patio or balcony with the right setup.
Choose bush varieties for container growing. Bush beans stay to about two feet tall without support and produce a generous harvest from a relatively small container.
Pole beans can be grown in very large containers with an appropriate tall support, but bush beans are more practical for most container situations.
The minimum container size for growing green beans is five gallons - large enough for four to six plants.
A ten-gallon container accommodates eight to ten plants and produces a more meaningful harvest.
Fill with quality potting mix and a balanced slow-release fertilizer incorporated at planting.
Green beans in containers need watering daily in warm weather and benefit from a light feeding with balanced liquid fertilizer every two to three weeks through the harvest season - slightly more than in-ground beans because of the limited soil volume.
One of the most productive uses of container space when learning how to grow green beans is a half-barrel planter - the large soil volume retains moisture better, stays cool longer in summer heat, and accommodates a generous planting of fifteen to twenty bush bean plants for an excellent concentrated harvest.
See our complete container vegetable gardening guide for full advice on growing green beans and other vegetables in pots and containers.
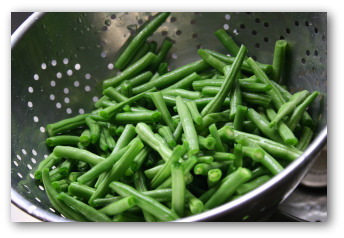
Preserving, Freezing, and Canning Green Beans
One of the great advantages of learning how to grow green beans is that they preserve exceptionally well, turning the concentrated harvest window of bush beans into a year-round supply of garden-grown food.
Freshly harvested green beans keep well in the refrigerator for four to five days stored unwashed in a sealed container or bag.
Do not wash before refrigerating - moisture accelerates deterioration. Use within this window for best texture and flavor.
Freezing is the simplest and best preservation method for a large green bean harvest.
Blanch beans in boiling water for two to three minutes, transfer immediately to ice water to stop cooking, drain thoroughly, and freeze in single-layer portions on a baking sheet before transferring to freezer bags.
Blanching is essential - it deactivates enzymes that continue to degrade quality even in the freezer.
Properly blanched and frozen green beans maintain excellent quality for eight to ten months.
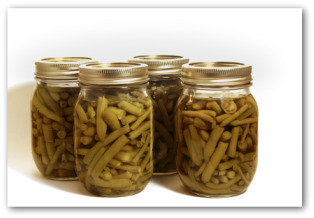
Canning is the classic preservation method for green beans, particularly in the American gardening tradition where canned beans are a pantry staple.
Green beans must be pressure canned rather than water bath canned because of their low acidity.
A pressure canner is the necessary equipment. Canned green beans keep for two years or more.
The flavor and texture of home-canned beans from your own garden is dramatically superior to commercially canned beans.
Pickling is another excellent option - dilly beans (green beans pickled with dill and garlic) are a popular and delicious preserve that can be water bath canned safely.
Frequently Asked Questions About How to Grow Green Beans

1. How long does it take to grow green beans from seed to harvest?
Bush beans are typically ready to harvest 50 to 55 days from direct sowing outdoors. Pole beans take 60 to 70 days to begin producing but then continue for the entire season. This makes bush beans one of the fastest-producing warm-season vegetables available - faster than tomatoes, peppers, cucumbers, and zucchini.
2. How many green bean plants do I need?
For fresh eating, eight to ten bush bean plants per person provides a generous supply during the harvest window. For preserving or canning, plan for twenty-five to thirty plants per person if you want enough for a significant preserved stock. With pole beans, four to six plants per person provides continuous fresh eating for the whole season.
3. Should I soak green bean seeds before planting?
Soaking green bean seeds in water for four to six hours before planting speeds germination slightly by softening the seed coat. It is not essential, particularly if soil is moist and warm, but it is a useful practice for early sowings when soil temperature is at the cool end of the acceptable range.
4. Can I grow green beans in partial shade?
Green beans need full sun for the best pod production. In four to five hours of sun they will grow and produce some pods, but quality and quantity will be significantly reduced compared to a full-sun position. Growing green beans in less than four hours of direct sun is generally not productive enough to be worthwhile.
5. Why are my green bean plants flowering but not setting pods?
The most common cause is heat stress - temperatures above 90 degrees Fahrenheit cause flowers to drop before setting pods. This is particularly common in mid to late summer. The solution is to wait for temperatures to cool and maintain consistent watering. Plants typically resume pod set when temperatures moderate below 90 degrees.
6. Do I need to inoculate green bean seeds?
Seed catalogs sell a powdered inoculant containing the nitrogen-fixing bacteria that live on bean roots. Dusting damp seed with it before planting can help in soil where beans have never grown. I have grown green beans for years without it and had good crops, so I don't consider it necessary, but it does no harm.
More Vegetable Growing Guides

More Expert Guidance on How to Grow Green Beans
According to the University of Illinois Extension, green beans are one of the most popular and rewarding vegetables for home gardeners at every level of experience.
Source: University of Illinois Extension - Growing Beans in the Garden
Continue building your vegetable growing knowledge with these guides...
- How to Grow Carrots — companion planting partner for green beans, complete growing guide
- Raised Bed Vegetable Gardening — ideal for growing bush and pole beans in a small footprint
- Container Vegetable Gardening Guide — growing bush beans on a patio or balcony
- Square Foot Gardening: The Complete Guide — spacing beans efficiently in a small bed
- Vegetable Planting Calendar — succession planting dates for beans and other crops
- Free Interactive USDA Zone Finder — confirm your frost dates before planting

Recent Articles


-
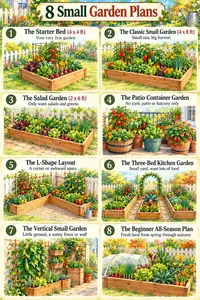
Small Vegetable Garden Plans: 8 Layouts That Maximise Space
Oct 08, 26 10:41 AM
 Small vegetable garden plans are some of the most searched and most valuable resources in home food growing.
 -
USDA Zone Finder - Find Your Vegetable Planting Dates | Vegetable-Gardening-Online.com
Oct 07, 26 03:53 PM
 Find your USDA hardiness zone, last spring frost date, and first fall frost date by state and region. Free interactive zone finder from Vegetable-Gardening-Online.com.
 -
Interactive Vegetable Garden Planner | Vegetable Gardening Online
Oct 07, 26 02:29 PM
Design a vegetable garden with correctly scaled plant spacing, companion flowers, drag-and-drop placement, and a printable plan. -
Free Printable Garden Stationery: Gardening Letter Paper & Note Cards
Oct 07, 26 12:48 PM
Free printable garden stationery: watercolor letter paper, lined and unlined, plus folded note cards with garden, fall, and Christmas scenes. Print at home. -
Free Preschool Vegetable Garden Cut and Paste Activities
Oct 07, 26 12:43 PM
 Free preschool vegetable garden cut and paste activities for ages 3-4. Build your own backyard, container, or seed packet garden scene, and sticker sheets.
 -
Planning a Vegetable Garden: Layouts, Raised Beds, Containers & More
Oct 06, 26 07:44 PM
 Planning a vegetable garden? Start here: layouts, raised beds, containers, square foot gardening, free planning tools, and tips to avoid beginner mistakes.
 -
How to Start a Vegetable Garden: 10 Easy Steps for Beginners
Oct 06, 26 04:38 PM
 How to start a vegetable garden in 10 easy steps: pick a sunny spot, choose raised beds or containers, prepare the soil, and grow easy vegetables.