- Home
- How to Grow Vegetables
- Growing Onions
- How to Grow Garlic
How to Grow Garlic: The Complete Guide from Clove to Harvest

Learning how to grow garlic is one of the most satisfying low-effort projects in the entire vegetable garden. Unlike crops that need daily watering, feeding, and watching all summer, garlic mostly takes care of itself.
You plant individual cloves in fall, let winter do its quiet work underground, watch the shoots take off in spring, and by early summer you are digging up full heads of garlic - each one grown from a single clove planted the previous autumn. Few vegetables offer that kind of satisfying, low-maintenance return on a single afternoon of planting.
Garlic is also one of the most genuinely useful things you can grow, since it finds its way into an enormous range of everyday cooking.
Homegrown garlic, properly cured, has a depth of flavor that is simply not present in the often months-old, imported garlic sold in grocery stores.
This complete guide covers everything you need to know about how to grow garlic - choosing between hardneck and softneck types, the right fall planting window, scapes, harvesting, curing, and storing a crop that will last well into the following year.
According to the University of Minnesota Extension, garlic grows best in well-drained, moisture-retentive soil with a pH between 6.0 and 7.0, planted in fall about one to two weeks after the first killing frost.
Source: University of Minnesota Extension - Growing Garlic in Home Gardens
Hardneck or Softneck Garlic? Choosing Your Type...

The first decision in how to grow garlic is choosing between the two main types, since they differ in climate suitability, flavor, storage life, and whether they produce the edible flower stalks called scapes.
Hardneck garlic (shown in the image above) is the better choice for gardeners in cooler climates, since it is more cold-hardy and tends to perform best where winters are genuinely cold.
It produces a stiff central stalk that grows a curling flower stem called a scape in late spring, which most growers cut off to redirect the plant's energy into bulb development rather than flowering - and the scapes themselves are a delicious bonus, used in cooking much like a mild, garlicky scallion.
Hardneck bulbs typically have fewer, larger cloves arranged in a single layer around the central stalk, and the cloves are notably easy to peel. The trade-off is a somewhat shorter storage life than softneck types.

(Softneck garlic (shown in the image above) is the type most often seen braided in kitchens and is the better choice for milder climates, since it does not require the same extended cold dormancy period that hardneck varieties prefer.
It has no central stalk and produces no scapes, but compensates with more cloves per bulb, arranged in multiple overlapping layers.
Softneck garlic generally stores significantly longer than hardneck - often six to eight months or more under good conditions - which is part of why it is the type most commonly sold in grocery stores.
Hardneck vs. softneck garlic
| Feature | Hardneck | Softneck |
|---|---|---|
| Best climate | Cooler regions; needs a real winter | Mild to warm regions |
| Scapes | Yes - edible bonus harvest | No central stalk; no scapes |
| Cloves per bulb | Fewer, larger; single layer; easy to peel | More, smaller; multiple layers |
| Storage life | Shorter - typically 3-5 months | Longer - often 6-8 months or more |
| Good for braiding | No - rigid central stalk | Yes - the classic braiding type |
Sourcing and Preparing Cloves to Plant

A key principle in how to grow garlic successfully is starting with the right planting material, which is referred to as "seed garlic" even though it is actually whole bulbs broken into individual cloves rather than true botanical seed.
Always source seed garlic from a garden center, farm stand, or online seed supplier rather than grocery store garlic. Garlic sold for eating is often treated to inhibit sprouting, may not be suited to your climate, and can occasionally introduce disease into your garden bed. Seed garlic, by contrast, is selected and grown specifically for planting and gives you a far more reliable start.
Just before planting, break each bulb apart into its individual cloves, being careful to keep the thin papery skin on each clove intact, since this skin protects the clove until it roots. Do this step right before planting rather than days in advance, since exposed cloves can dry out. Select only the largest, firmest cloves for planting - size at planting time has a direct relationship to bulb size at harvest, so resist the temptation to plant the smaller cloves from each bulb. Use those smaller ones in the kitchen instead and save your best cloves for the garden.
When to Plant Garlic

Timing is arguably the single most important factor in how to grow garlic well, and it is also one of the most counterintuitive aspects for gardeners used to spring planting.
Garlic is planted in fall, not spring, because it needs an extended period of cold - generally at least four to eight weeks below about 40 degrees Fahrenheit - to trigger the bulb division that produces a proper head of multiple cloves rather than a single undivided round.
Plant garlic cloves about one to two weeks after your first killing frost, once the soil has cooled but is still workable. This timing allows roots to establish before the ground freezes solid, without leaving enough time for noticeable top growth to emerge before winter sets in - which is exactly what you want, since the plant should be quietly rooting underground through the cold months rather than struggling through frozen foliage. Use our free interactive zone finder to confirm your typical first frost date before planning your how to grow garlic planting schedule for the season.
In most of the continental US, this means planting sometime in October or November, though milder southern climates may plant as late as December. If you missed the fall planting window entirely, garlic can still be planted in very early spring as soon as the soil can be worked, though bulbs from a spring planting are typically smaller than those given a proper fall start with the cold dormancy period they prefer.
Garlic planting and harvest calendar by region
| Region | Plant Cloves | Cut Scapes (hardneck) | Harvest Bulbs |
|---|---|---|---|
| Northern US (Zones 3-5) | Mid-September to October | Late May to June | Mid-July to early August |
| Mid-Atlantic / Midwest (Zones 5-6) | October | May to June | Late June to July |
| Pacific Northwest (Zones 7-8) | October to November | May | June to July |
| Southern US (Zones 8-10) | November to December | April to May | May to June |
Soil Preparation and Site Selection

Good soil preparation makes a real difference in how to grow garlic with large, healthy bulbs, since this crop sits in the same spot for many months and depends entirely on the bed it is given at planting time. Skipping this step is one of the most common shortcuts that undermines an otherwise careful how to grow garlic plan.
Garlic needs full sun and grows best in loose, well-drained, fertile soil with a pH between 6.0 and 7.0. Waterlogged soil is one of the fastest ways to lose a garlic crop to rot, so good drainage matters more for garlic than for almost any other common vegetable. If your native soil is heavy clay, a raised bed filled with a properly blended raised garden bed soil mix solves the drainage problem completely and is well worth the investment for a crop that will occupy that space for the better part of a year.
Work two to three inches of compost or well-rotted manure into the bed before planting, since garlic is a fairly heavy feeder and benefits from rich, organic-matter-rich soil. Avoid fresh, unrotted manure, however, since it can introduce harmful bacteria and encourage exactly the kind of weed growth that competes most aggressively with young garlic in spring.
How to Plant Garlic Cloves

The mechanics of how to plant garlic are simple once the bed is prepared, and getting the orientation and depth right is the most important detail to get correct.
Plant each clove pointed end up and flat (root) end down - the roots grow from the flat base and the shoot emerges from the pointed tip, so planting upside down forces the new shoot to grow the long way around the clove before reaching the surface, delaying and weakening early growth. Push cloves into loosened soil so the tip sits about two inches below the surface, which generally means a planting hole roughly three to four inches deep depending on clove size.
Space cloves four to six inches apart within rows, with rows themselves spaced about twelve to eighteen inches apart, or closer together at six inches in double rows centered on a wider bed if space is limited.
After planting, water the bed lightly to settle the soil around the cloves, then apply a generous three to four inch layer of straw or shredded leaf mulch over the entire planting area. This mulch is one of the most important steps in how to grow garlic successfully through winter, since it insulates the soil against temperature swings, suppresses weeds that would otherwise compete heavily with garlic in early spring, and helps retain consistent soil moisture.
Garlic clove planting at a glance
| Element | Recommendation |
|---|---|
| Orientation | Pointed end up, flat (root) end down |
| Planting depth (tip below surface) | About 2 inches |
| Spacing between cloves | 4-6 inches |
| Spacing between rows | 12-18 inches (or 6 inches in double rows) |
| Mulch depth after planting | 3-4 inches of straw or shredded leaves |
Caring for Garlic Through Fall, Winter, and Spring

One of the appealing things about how to grow garlic is how little active care it needs once the cloves are planted and mulched - but a few well-timed tasks across the seasons make a real difference to the final harvest. Most of what matters in how to grow garlic well from this point on comes down to good timing rather than constant attention.
Through fall and winter, garlic needs essentially no attention at all once mulched. The cloves are quietly rooting underground, and the mulch layer is doing the work of protecting them from temperature swings. Resist any urge to dig around or disturb the bed during this dormant period.
In early spring, once you see the first green shoots pushing up through the mulch, remove or thin the mulch layer slightly to let the soil warm and the shoots emerge more easily, then give the bed a feed of balanced or nitrogen-rich fertilizer to fuel the vigorous leaf growth that is now beginning - more leaf growth at this stage generally translates into larger bulbs later.
Control weeds diligently through spring, since young garlic competes poorly against weeds and a weedy bed can measurably reduce bulb size by harvest time.
For hardneck varieties, watch for scapes - the curling flower stalks - emerging in late spring, typically May or June depending on your region. Cut these off once they have curled into a fairly complete loop, since leaving them to flower diverts energy away from bulb development and into seed production instead.
Use the scapes in cooking; they have a delicious, milder garlic flavor and make excellent pesto.
Stop watering garlic about two weeks before harvest, once the lower leaves on the plant begin turning brown. Continued watering at this late stage can stain the bulb wrappers and increase the risk of disease right at the point when the crop is most vulnerable.
When and How to Harvest Garlic

Knowing exactly when to harvest is one of the trickier judgment calls in how to grow garlic, since pulling bulbs too early or too late both reduce quality, and the visual cues require a little practice to read confidently. Getting this timing right is the final test of a successful how to grow garlic season.
The standard guidance is to harvest when about half of the plant's leaves have turned brown while the upper leaves remain green - typically sometime in June or July depending on your region and variety. If you are uncertain, the most reliable way to check is to carefully dig up one or two test bulbs and slice them in half: if the individual cloves have filled out and are clearly visible and well-defined within the wrapper, the rest of the bed is ready. Waiting too long causes bulbs to split apart underground and their protective skins to crack, both of which significantly shorten storage life.
To harvest, never pull or yank garlic up by the stalk, since this risks tearing the bulb away from its roots or bruising the cloves. Instead, use a garden fork to gently loosen the soil alongside each plant before lifting the bulb out from below. Knock off large clumps of soil, but do not wash the bulbs and do not remove the stalks, roots, or outer wrapper at this stage - the entire plant needs to go through curing intact.
Curing and Storing Garlic

Curing is the step that most new gardeners underestimate, and skipping or rushing it is the single biggest reason a homegrown harvest fails to store as long as it should.
Immediately after harvest, move whole plants - bulbs, stalks, roots, and all - to a warm, dry, well-ventilated, shaded location out of direct sun. A covered porch, garage, or shed all work well.
Spread bulbs out in a single layer, or hang them in small bunches of four to six tied together by their stalks.
Curing typically takes two to four weeks, and you will know it is complete when the outer wrapper around each bulb feels fully dry and papery, the neck has tightened and hardened, and the roots have dried out as well.

Once cured, trim the roots close to the base of the bulb and cut the stalks down to about one to two inches above the bulb, unless you are working with softneck garlic and want to braid the still-flexible stalks together for traditional hanging storage instead.
Brush off any remaining loose soil but still avoid washing the bulbs, since moisture is exactly what shortens storage life.
For long-term storage, keep cured garlic in a cool, dark, dry location with good airflow - around 55 to 65 degrees Fahrenheit is ideal. A mesh bag, a loosely woven basket, or a dedicated garlic keeper jar with ventilation holes all work well.
Never store garlic in the refrigerator, which is both too cold and too humid, and never seal it in an airtight container or plastic bag, since trapped moisture quickly leads to mold.
Stored properly, softneck garlic typically lasts six to eight months or longer, while hardneck garlic generally keeps for three to five months.
Set aside your largest, healthiest bulbs from this harvest to use as next fall's seed garlic, and the whole how to grow garlic cycle begins again.
Common Problems When Growing Garlic

A handful of recurring issues account for most of the trouble gardeners encounter while learning how to grow garlic, and nearly all of them trace back to timing, moisture, or soil drainage. The good news is that once you recognize the pattern, how to grow garlic without these issues becomes second nature.
Small bulbs at harvest are usually the result of planting small cloves to begin with, insufficient spring feeding when leaf growth matters most, overcrowding, or a fall planting that went in too late to get adequate root establishment before winter. Reviewing each of these factors and adjusting for the following season typically resolves the issue.
Split or cracked bulbs, with cloves visibly separating apart underground, almost always mean the harvest was left too long in the ground past peak readiness. Checking test bulbs regularly as the harvest window approaches helps avoid this.
Yellowing or stunted plants in spring can point to several causes, including waterlogged soil, nutrient deficiency, or pest pressure from onion maggot, which is the most common insect concern for garlic in many regions. Good drainage and a fall planting bed that never sits wet are the most effective preventive steps. White rot and other fungal diseases are most often introduced through infected seed garlic, which is the strongest argument for always sourcing clean, disease-tested seed garlic from a reputable supplier rather than grocery store bulbs.
Brown scarring on individual cloves is typically the work of tiny bulb mites feeding on the clove surface, usually a cosmetic rather than crop-destroying issue, though heavily affected cloves are best used immediately rather than saved for replanting.
Common garlic problems and solutions
| Problem | Most Likely Cause | Solution |
|---|---|---|
| Small bulbs at harvest | Small cloves planted; late fall planting; overcrowding | Plant only the largest cloves; plant on time; proper spacing; feed in spring |
| Split or cracked bulbs | Left in ground too long past maturity | Check test bulbs regularly near harvest window; harvest promptly when ready |
| Yellowing or stunted plants | Waterlogged soil; nutrient deficiency; onion maggot | Improve drainage; spring feeding; crop rotation to reduce pest carryover |
| Bulb rot | Poor drainage; planted too wet or too deep | Raised beds for better drainage; correct planting depth |
| Brown scarring on cloves | Bulb mite feeding | Mostly cosmetic; use affected cloves promptly rather than saving for seed |
Companion Planting for Garlic
 Companion planting flowers in the garden can help deter garden pests.
Garlic is one of the most valuable companion plants in the entire vegetable garden, not just a crop that benefits from good companions itself - an extra dimension worth considering once you have the basics of how to grow garlic underway. Its strong scent is widely reported to deter aphids, many beetles, and even larger pests like squirrels and rabbits, making it a useful plant to tuck in around the edges of beds growing more vulnerable crops.
Roses, tomatoes, and brassicas like cabbage and broccoli are all commonly interplanted with garlic to take advantage of this pest-deterrent effect. Carrots and garlic make reasonable bed neighbors as well, since their different growth habits do not compete significantly for space or light.
Keep garlic away from beans and peas, since alliums can inhibit the nitrogen-fixing bacteria that legumes depend on, reducing the soil benefit those crops would otherwise provide. Asparagus is generally best kept at a distance from garlic for similar reasons. See our complete companion planting chart for vegetables for the full guide to pairing garlic with other crops in your garden.
Frequently Asked Questions
About How to Grow Garlic

1. How long does it take to grow garlic from planting to harvest?
Garlic has one of the longest growing cycles of any common vegetable in how to grow garlic terms - planted in fall and harvested the following summer, the full cycle runs roughly eight to nine months. Most of that time, however, requires no active attention from the gardener, since the plant is either dormant underground through winter or growing quietly with minimal care through spring.
2. Can I grow garlic from grocery store cloves?
It is possible, but not recommended. Grocery store garlic is often treated to inhibit sprouting, may be a variety poorly suited to your specific climate, and occasionally carries diseases that can persist in garden soil for years. Seed garlic from a reputable garden center or seed supplier, bred and selected specifically for planting, gives far more reliable results.
3. What do I do with garlic scapes?
Garlic scapes, the curling flower stalks produced by hardneck varieties in late spring, should be cut off once they form a fairly complete loop, both to redirect the plant's energy into bulb development and because they are genuinely delicious. Use them anywhere you would use a mild garlic or scallion - sautéed, grilled, or blended into a vibrant garlic scape pesto.
4. Why did my garlic only produce a single round bulb instead of separate cloves?
A garlic plant that produces one solid, undivided round rather than a head of distinct cloves usually means it did not receive enough cold exposure during dormancy - typically because it was planted too late in fall, planted in spring instead, or grown in a climate that is simply too mild for that particular variety. Choosing a softneck variety suited to milder climates, or adjusting your planting timing, usually resolves this in future seasons.
5. How many garlic plants should I grow?
A reasonable starting point for a household that cooks with garlic regularly is twenty to thirty cloves planted, which typically yields enough bulbs for cooking through much of the year plus a few of the best bulbs set aside to replant the following fall. Keen garlic enthusiasts often plant fifty or more cloves once they discover how easy and rewarding the crop is to grow.
More Vegetable Growing Guides

- Growing Vegetables — complete hub for growing all vegetables at home

Recent Articles


-
How to Grow Cabbage
Sep 15, 26 12:33 PM
 How to Grow Cabbage: The Complete Guide from Seed to Harvest. This complete guide covers everything you need to know about how to grow cabbage.
 -
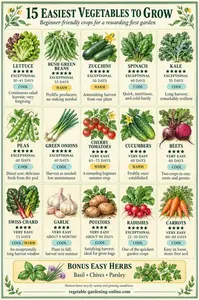
Easiest Vegetables to Grow: 15 Foolproof Crops for Beginners
Sep 15, 26 09:24 AM
 Easiest vegetables to grow for beginners - with advice on what makes each one easy, how to get started, and which vegetables are harder than they look.
 -
How to Grow Green Beans
Sep 14, 26 07:53 PM
 How to Grow Green Beans: The Complete Guide to Bush and Pole Beans. Green beans are one of the most forgiving crops a beginner can choose.
 -
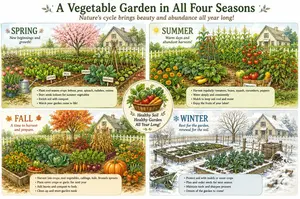
Seasonal Vegetable Garden
Sep 14, 26 05:38 PM
 Seasonal Vegetable Garden — Growing Food Through Every Season
 -
Overwintering Vegetables: Fall-Planted Crops for Early Spring Harvest
Sep 14, 26 05:35 PM
 Learn about overwintering vegetables like garlic, fava beans, and onions, planted in fall to sit through winter and reward you with an early spring harvest.
 -
Free Vegetable Garden Journal— Printable Downloads for Home Gardeners
Sep 14, 26 01:51 PM
 Download our free Vegetable Garden Journal — choose a full 16-page version or simpler 7-page journal. Track planting, harvest, & garden notes season by season.
 -
Free Vegetable Garden Cut and Paste Activities for Kids Ages 5-7
Sep 12, 26 09:13 PM
 Free printable vegetable garden cut and paste activities for kids ages 5-7. Build your own garden, match seeds to plants, and learn what grows where.