- Home
- How to Grow Vegetables
- Growing Potatoes
- Potatoes
How to Grow Potatoes: The Complete Guide from Seed Potato to Harvest

Learning how to grow potatoes is one of the most satisfying experiences in vegetable gardening. Potatoes are the ultimate treasure-hunt crop - nothing in the garden compares to the moment of thrusting a fork into the soil and turning up a cluster of perfect, freshly grown potatoes gleaming in the earth. Knowing how to grow potatoes well also gives you access to a world of variety that supermarkets never offer - fingerlings, heirloom reds and purples, waxy salad varieties, and buttery yellow-fleshed types that have no commercial equivalent.
How to grow potatoes is a question every new vegetable gardener asks sooner or later, because potatoes are one of the most beloved and productive crops a home garden can produce. This complete how to grow potatoes guide covers everything you need from choosing the right seed potatoes through to curing and storing your harvest. Whether you have a large in-ground garden, a few raised beds, or just a sunny patio where you can place grow bags, this guide will give you everything you need for a successful potato harvest. According to the University of Maine Cooperative Extension, potatoes are one of the most productive vegetable crops for home gardeners, capable of producing ten or more pounds of food per pound of seed potato planted in good conditions.
Source: University of Maine Cooperative Extension - Growing Potatoes in the Home Garden
Choosing Potato Varieties
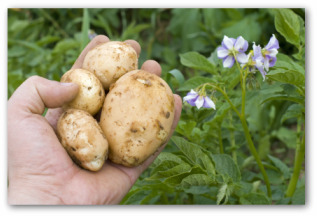
The first step in how to grow potatoes successfully is choosing the right variety for your purpose. One of the greatest pleasures of knowing how to grow potatoes at home is access to the extraordinary range of varieties that are completely unavailable in supermarkets. Commercial potato production uses only a handful of high-yield, long-shelf-life varieties. Home gardeners have access to hundreds of varieties with dramatically different flavors, textures, colors, and uses.
Potatoes are classified by their days to maturity into three categories: early-season, mid-season, and late-season. Understanding this classification is important for how to grow potatoes in your specific climate, especially in short-season northern gardens where late varieties may not have enough time to mature before frost.
Early-season potatoes (65 to 80 days) are the first to produce harvestable tubers. They are the best choice for gardeners who want new potatoes as early as possible, for northern gardens with short frost-free seasons, and for growing potatoes in containers or grow bags where the limited soil volume suits compact early varieties. Red Norland, Yukon Gold, and Irish Cobbler are excellent early varieties.
Mid-season potatoes (80 to 100 days) provide the largest range of variety choice and include many of the most flavorful and distinctive types available. Yukon Gold is technically mid-season in some classifications - reliably productive, beautiful golden flesh, and arguably the best all-purpose flavor of any commonly available potato. Red Pontiac, Kennebec, and Carola are other excellent mid-season choices for how to grow potatoes with outstanding kitchen quality.
Late-season potatoes (100 to 130 days) produce the largest yields and include the long-storing varieties that keep through winter in proper storage. Russet Burbank (the classic baking potato), German Butterball, Fingerling types, and Katahdin are all late-season varieties worth growing if your season is long enough.
Potato variety guide for home gardeners
| Variety | Season | Days | Flesh Color | Best Use |
|---|---|---|---|---|
| Yukon Gold | Early/Mid | 65-70 days | Yellow | All-purpose; mashing; roasting; best flavor for beginners |
| Red Norland | Early | 70-80 days | White | Boiling; salads; excellent new potato; good for northern gardens |
| Kennebec | Mid | 80-85 days | White | All-purpose; disease resistant; excellent storage; reliable in all climates |
| Red Pontiac | Mid | 80-90 days | White | Boiling; baking; stores well; reliable and productive |
| Russet Burbank | Late | 90-100 days | White/fluffy | Classic baking potato; frying; needs loose deep soil |
| German Butterball | Mid/Late | 85-95 days | Deep yellow | Outstanding rich flavor; roasting; one of the best-tasting varieties |
| Purple Majesty | Early/Mid | 70-80 days | Deep purple | Striking appearance; antioxidant-rich; boiling and salads |
| French Fingerling | Late | 100-110 days | Yellow with pink | Roasting; salads; gourmet cooking; beautiful presentation |
| Carola | Mid | 80-90 days | Yellow | German heirloom; superb flavor; excellent for grow bags and containers |
Seed Potatoes: What They Are and Why They Matter
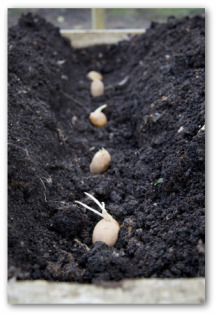
A critical point in how to grow potatoes is understanding what seed potatoes are and why you should never plant supermarket potatoes instead. Seed potatoes are specifically grown, certified disease-free potato tubers from reputable suppliers. They are inspected and certified to be free from the viral and bacterial diseases that affect the potato family, and they have not been treated with sprout inhibitors.
Supermarket potatoes have almost always been treated with sprout inhibitors to extend their shelf life - this is why they rarely sprout in the kitchen even after weeks. Attempting to use them for how to grow potatoes at home results in poor sprouting, weak growth, and potentially introduces diseases to your garden soil. Certified seed potatoes from a reputable garden supplier or online seed company are inexpensive and the only reliable starting point for how to grow potatoes successfully.
Chitting seed potatoes before planting is a step that gives you a head start in how to grow potatoes, particularly valuable in short-season climates. Chitting means allowing seed potatoes to develop short, sturdy sprouts before planting. Place seed potatoes in a single layer in egg cartons or shallow trays, eye-end up, in a cool (45 to 55 degrees Fahrenheit), light (but not sunny) location for four to six weeks before your planned planting date. The resulting short, green sprouts (called chits) accelerate early growth after planting and can advance your first harvest by two to three weeks compared to unchitted seed potatoes.
Cut large seed potatoes into pieces with one to two eyes (the indentations where sprouts emerge) each. Allow cut pieces to dry and callous for 24 to 48 hours before planting - this prevents rot at the cut surface. Small seed potatoes the size of a golf ball or smaller can be planted whole.
When and Where to Plant Potatoes

Timing is a critical element of how to grow potatoes well. Potatoes are cool-season crops that grow best in soil temperatures between 45 and 65 degrees Fahrenheit. They are more cold-tolerant than most vegetables but are damaged by hard frost - the goal in how to grow potatoes is to plant early enough to take advantage of cool spring temperatures, while avoiding the killing frosts that would damage young plants.
Plant seed potatoes outdoors two to four weeks before your last frost date, when soil has warmed to at least 45 degrees Fahrenheit. In most of the US this means planting in March (South), April (Midwest and Mid-Atlantic), or May (North). This timing allows potato tops to emerge into cool spring weather, which is ideal for vegetative growth. Tubers form underground during this cool period and are well advanced before summer heat arrives. Use our free interactive zone finder to confirm your last frost date before planning your potato planting schedule.
Location is important in how to grow potatoes productively. Potatoes need full sun - six to eight hours minimum. They also need good air circulation to reduce the risk of blight, the most serious potato disease. Avoid planting in low-lying areas where cold air or moisture collects. The best position for growing potatoes is an open, sunny bed with good drainage.
Crop rotation is essential when planning how to grow potatoes season after season. Never plant potatoes in soil where potatoes, tomatoes, peppers, or eggplant were grown in the previous two to three years. All of these are in the nightshade family and share the same soil-borne diseases. Rotating potatoes to a fresh bed location each year is the single most effective disease prevention strategy in how to grow potatoes organically.
Potato planting calendar by region
| Region | Plant Outdoors | Best Varieties | Expected Harvest |
|---|---|---|---|
| Northern US (Zones 3-5) | Late April to mid May | Early and mid-season; Yukon Gold, Red Norland | Late July through September |
| Midwest / Mid-Atlantic (Zones 5-6) | Late March to late April | All types; excellent range available | July through October |
| Pacific Northwest (Zones 7-8) | March to April | All types; ideal climate for potatoes | July through October |
| Southern US (Zones 7-9) | Late January to March | Early varieties preferred; harvest before summer heat | May through July |
Soil Preparation for Growing Potatoes

Soil preparation is one of the most important foundations in how to grow potatoes with large, well-formed tubers. Potatoes grow underground and need to push through soil to develop - compacted, rocky, or heavy clay soil produces misshapen, small tubers. Loose, deep, well-draining soil produces the large, smooth, well-formed potatoes that make knowing how to grow potatoes so rewarding.
The ideal soil for how to grow potatoes is loose, deep, well-draining, and slightly acidic with a pH of 5.0 to 6.5. This slightly acidic pH is one of the unique preferences of the potato crop - it helps prevent common scab, the skin disease that causes rough, scabby patches on potato surfaces. Do not add lime to potato beds, as raising pH toward neutral increases scab incidence significantly. If your soil is acidic naturally, this is an advantage when growing potatoes.
Work the potato bed to a depth of at least twelve inches before planting. Remove stones and break up any compaction. Work in two to three inches of compost but do not add fresh manure to a potato bed - fresh manure raises soil nitrogen levels excessively, which promotes leafy growth at the expense of tuber development and can increase scab. Well-aged compost is the ideal soil amendment for how to grow potatoes in most home gardens.
One of the most practical solutions for how to grow potatoes in difficult native soil is raised beds or grow bags. A raised bed filled with loose growing mix eliminates all the compaction and drainage problems that make in-ground potato growing challenging, and allows you to grow potatoes in any garden regardless of native soil quality. Grow bags take this a step further - see the dedicated grow bag section below.

How to Plant Potatoes

The planting process for how to grow potatoes is straightforward once you have prepared your seed potatoes and soil. The key principles are correct depth, adequate spacing, and ensuring the growing tip (eye) faces upward.
Dig trenches or individual holes four to six inches deep for standard varieties. Place seed potatoes or cut pieces in the trench with the eyes (sprouts if chitted) facing upward, spaced twelve to fifteen inches apart for bush and mid-season varieties and fifteen to eighteen inches apart for larger late-season types. Leave twenty-four to thirty-six inches between rows to allow space for hilling later. Cover seed potatoes with three to four inches of soil initially, leaving a shallow depression above each planting position so you can add more soil as plants grow.
Do not plant seed potatoes more than six inches deep initially. The common mistake in how to grow potatoes is planting too deep - this delays emergence and reduces the number of stolons (underground stems) that develop into potato-bearing branches. The additional soil depth comes during hilling, not at planting.
Water after planting to settle the soil. Potatoes typically take two to four weeks to emerge depending on soil temperature. In cold soil they are slow - in warm soil they emerge quickly. Do not water heavily between planting and emergence unless the soil becomes genuinely dry - cool, moist (not wet) soil is ideal for tuber initiation in the early stages of how to grow potatoes.
Hilling Potatoes

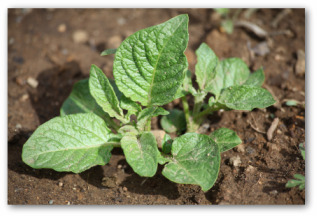
Hilling is the most distinctive and most important ongoing technique in how to grow potatoes, and the one that most sets potato growing apart from other vegetables. Hilling means repeatedly drawing soil up around the base of the growing potato plants as they grow taller, creating a mound or hill of soil around each plant.
There are two important reasons why hilling is fundamental to how to grow potatoes successfully.
First, potatoes form on underground stems called stolons that branch out from the main stem. The more stem length that is underground, the more stolons form, and the more potatoes are produced. Hilling buries more stem and directly increases yield.
Second, potatoes that are exposed to light turn green - a process called greening that produces solanine, a mildly toxic compound that makes green potatoes unpalatable and potentially harmful. Keeping tubers covered with soil prevents greening entirely.
Begin hilling when potato plants are eight to ten inches tall. Draw soil up around the base of each plant, covering the lower stem to leave only four to six inches of growth exposed above the new soil level. Repeat this hilling process every two to three weeks as the plants continue to grow, building the hill progressively higher. By the time plants reach their full height, the hill around each plant should be eight to twelve inches above the original soil level. Straw can be used in place of additional soil for the upper layers of hilling - it is lighter, retains moisture well, and makes harvesting easier.
How to grow potatoes without hilling is possible but significantly reduces yield and increases the risk of green potatoes. In grow bags and containers, hilling is replaced by progressively adding more soil or compost as the plants grow - the same princip
Watering and Feeding Potatoes
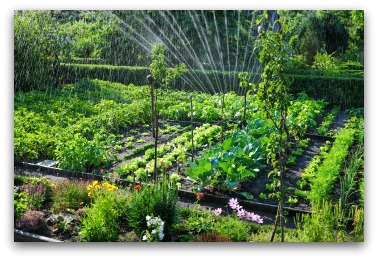
Consistent watering is one of the most important ongoing skills in how to grow potatoes with high-quality, well-formed tubers. Water stress at critical growth stages directly causes common potato problems - hollow heart, knobby deformed tubers, and poor yields all trace back to inconsistent moisture.
Potatoes need approximately one to two inches of water per week. The most critical period for consistent moisture in how to grow potatoes is from flowering through to harvest - this is when tubers are actively forming and sizing up, and any drought stress at this stage produces undersized, misshapen, or hollow tubers. Before flowering, water needs are more moderate. After the plant tops begin to yellow and die back naturally, reduce watering significantly to begin the curing process that prepares potatoes for harvest.
Water deeply and evenly rather than shallowly and frequently. Inconsistent moisture - particularly a drought period followed by heavy watering - causes potato tubers to crack or develop second growth (knobby outgrowths), reducing their appearance and usability significantly. Mulching over the potato hills with straw after hilling is complete helps maintain the even soil moisture that how to grow potatoes well requires.
Feeding requirements for how to grow potatoes are moderate. At planting, the compost-enriched soil provides adequate background nutrition for most of the season. A side-dressing of a balanced fertilizer when plants are eight inches tall supports strong vegetative growth. Once flowering begins, switch to a low-nitrogen, high-phosphorus feed or stop additional fertilizing entirely - excess nitrogen at this stage promotes lush tops at the expense of tuber development.
How to Grow Potatoes in Grow Bags and Containers

Growing potatoes in grow bags is one of the most exciting and practical developments in how to grow potatoes for gardeners with limited space. Grow bags allow anyone with a sunny patio, balcony, or small yard to grow a meaningful potato harvest without any in-ground soil at all - and the harvest method of simply tipping the bag over is one of the most satisfying moments in all of vegetable gardening.
How to grow potatoes in grow bags follows the same principle as in-ground hilling but in a contained, vertical form. Start with a large grow bag - at least ten gallons, and fifteen to twenty gallons is better for larger varieties. Roll down the sides of the bag to reduce its height. Add six inches of good quality potting mix and compost blend. Place two to three seed potatoes on the surface and cover with four inches of growing mix. As plants grow to six to eight inches tall, add more growing mix to cover the lower stem, leaving four to six inches of growth exposed. Continue adding growing mix as plants grow, unrolling the bag sides as the fill level rises. By the end of the season the bag should be nearly full.
The most productive approach to how to grow potatoes in grow bags is to choose early or mid-season varieties that do well in containers - Yukon Gold, Carola, Charlotte, and Red Norland all perform excellently in grow bags. Fingerling varieties are particularly elegant in grow bag production.
When the plants have died back naturally, tip the entire bag onto a tarp or open ground and harvest the potatoes by hand from the loose growing mix. This no-dig harvest is genuinely fun and particularly enjoyable for children. The absence of stone and compaction in the growing mix means every potato is perfectly formed. See our complete container vegetable gardening guide for additional advice on growing potatoes and other vegetables in containers.
How to grow potatoes in grow bags: step by step
| Stage | Action | Notes |
|---|---|---|
| Start | Roll down bag sides; add 6 inches of growing mix; place 2-3 seed potatoes; cover with 4 inches of mix | Use 15-20 gallon bag; mix compost into growing medium |
| Plants at 6-8 inches | Add 4 more inches of growing mix; leave top 4 inches of growth exposed | Unroll bag sides as fill level rises |
| Plants at 12-14 inches | Add 4 more inches of growing mix again | Continue leaving 4-6 inches of growth exposed |
| Plants fully grown | Maintain moisture; feed lightly if needed; water consistently | Bag should be nearly full; plants will flower then die back |
| Tops yellowing | Reduce watering; wait 2 weeks after tops die back completely | Curing begins naturally in the bag |
| Harvest | Tip bag onto tarp; sort through growing mix by hand to find potatoes | Enjoy the treasure hunt! All potatoes will be perfectly formed |
Common Problems When Growing Potatoes

Growing potatoes without encountering any problems is rarely possible - but most common potato issues are preventable or manageable once you know what causes them. Here are the most common problems in how to grow potatoes and how to address each one.
Blight is the most serious disease threat in how to grow potatoes. Late blight (Phytophthora infestans) - the same disease responsible for the Irish Potato Famine - causes dark, water-soaked patches on leaves that spread rapidly in warm, wet weather. Early blight causes dark spots with a concentric ring pattern. Both spread rapidly and can devastate a potato crop. Prevention is the best approach in how to grow potatoes organically: choose blight-resistant varieties (Kennebec, Elba, Defender), practice strict crop rotation, ensure good air circulation with adequate spacing, and avoid overhead watering. If blight is detected early, remove and destroy affected plant material immediately and apply a copper-based organic fungicide spray.
Common scab causes rough, raised, corky patches on the potato skin that can be peeled off with the skin. It does not affect eating quality but reduces appearance. Scab is favored by alkaline soil (pH above 6.5) and dry soil conditions during tuber formation. Prevent scab when growing potatoes by maintaining soil pH below 6.5, keeping soil consistently moist during tuber development, and avoiding fresh manure.
Colorado potato beetle is the most significant insect pest in how to grow potatoes in most of the US. The distinctive yellow-striped adult beetles and their orange-red larvae feed on potato leaves and can defoliate plants rapidly. Hand picking adults, egg clusters (orange ovals on leaf undersides), and larvae is effective for small plantings. Bt (Bacillus thuringiensis var. tenebrionis) spray is an effective organic control for larvae.
Common potato growing problems and solutions
| Problem | Cause | Solution |
|---|---|---|
| Late blight (dark water-soaked patches) | Phytophthora infestans fungus; warm wet weather | Resistant varieties; crop rotation; copper spray; remove affected material |
| Common scab (rough corky patches) | pH too high; dry conditions during tuber formation | Keep pH below 6.5; consistent watering; no fresh manure; no lime |
| Green potatoes | Tubers exposed to light | Hill consistently; keep tubers covered; store in darkness |
| Hollow heart (cavity in center) | Inconsistent moisture; rapid growth after drought | Consistent watering; avoid high-nitrogen fertilizers |
| Knobby or deformed tubers | Inconsistent watering; interrupted growth | Water consistently; mulch heavily; avoid drought stress |
| Colorado potato beetle | Beetle feeding on leaves | Hand pick adults and larvae; Bt spray; row cover on young plants |
| Poor germination or rotting seed potatoes | Soil too cold or wet; unhealed cut surfaces | Plant in 45°F+ soil; allow cut pieces to callous 24-48 hours before planting |
How to Harvest Potatoes

Harvesting is one of the most enjoyable stages of how to grow potatoes - there is genuine excitement in not knowing exactly how many and how large the potatoes under the soil will be until you dig them up. Getting the timing and technique right protects your harvest and maximizes yield.
There are two types of potato harvest in how to grow potatoes at home: new potatoes and mature potatoes.
New potatoes are small, immature tubers harvested while the plant is still actively growing and the tops are green and healthy - typically when the plant first begins to flower. New potatoes have thin, delicate skin and a sweet, waxy flavor that is completely different from mature potatoes. Reach into the hill carefully with your hands to remove a few small tubers without disturbing the plant, leaving the rest to continue sizing up.
Mature potato harvest happens after the plant tops have naturally died back. When the foliage turns yellow and dies down completely, stop watering and wait two weeks. This waiting period allows the potato skins to set and thicken underground - a critical step in how to grow potatoes for storage. Potatoes with uncured, thin skins bruise and deteriorate very quickly; properly cured skins are thick, firm, and protect the potato through months of storage.
When you are ready to harvest mature potatoes, use a garden fork to loosen the soil from the side of the hill rather than underneath it - inserting the fork directly under a hill risks spearing tubers. Work the fork in eight to ten inches away from the plant, angle it toward the hill, and lever the soil upward. The potatoes will be scattered through the top eight to twelve inches of the hill. Collect every potato you can find - any left in the soil become volunteer plants in subsequent seasons.
Curing and Storing Potatoes After Harvest

Proper curing and storage is the final and most often neglected stage of how to grow potatoes for a long-lasting supply. A well-grown, well-stored potato harvest provides fresh homegrown potatoes for months after harvest - one of the most satisfying outcomes of knowing how to grow potatoes well.
Curing is the process of hardening potato skins and healing any small cuts or wounds from harvest. To cure potatoes properly, spread them in a single layer in a dark, well-ventilated space at 50 to 65 degrees Fahrenheit and 85 to 90 percent humidity for ten to fourteen days. A basement, garage, or cool shed works well. Do not wash potatoes before curing - the soil on the skin actually helps protect them and should be brushed off only when you are ready to use them. After curing, the skins will be set and any surface wounds will have healed with a protective corky layer.
For long-term storage after curing, keep potatoes in a dark (light exposure causes greening), cool (32 to 40 degrees Fahrenheit), humid (90 percent humidity) environment. A root cellar is the classic ideal storage for how to grow potatoes for winter use. A cool basement, unheated garage, or even a cooler with ice packs changed periodically approximates these conditions well in the absence of a dedicated root cellar.
Do not store potatoes near apples or other fruit. Ripening fruit produces ethylene gas that causes potatoes to sprout prematurely. Store separately and check the stored crop every few weeks, removing any potatoes that have softened or begun to rot before they affect their neighbors.
Frequently Asked Questions About How to Grow Potatoes
1. How long does it take to grow potatoes from planting to harvest?
How to grow potatoes on a specific timeline depends on the variety. Early-season varieties are ready in 65 to 80 days from planting. Mid-season varieties take 80 to 100 days. Late-season varieties need 100 to 130 days. For new potatoes (small immature tubers), you can harvest as early as 60 to 70 days from planting when plants begin to flower.
2. How many potatoes does one plant produce?
Under good growing conditions, one potato plant typically produces five to ten or more pounds of potatoes over a season. In ideal conditions with proper hilling and consistent moisture, yields of ten to fifteen pounds per plant are achievable. How to grow potatoes for maximum yield centers on thorough hilling to maximize the number of underground stolons, consistent moisture through tuber formation, and choosing varieties known for high productivity.
3. Can I eat green potatoes?
Green areas on potatoes contain solanine, a mildly toxic compound. Small green areas can be cut away generously - the remaining potato is fine to eat. Heavily greened potatoes with extensive green patches should be discarded. How to grow potatoes without any greening is simply a matter of consistent hilling to keep all developing tubers buried in soil, and storing harvested potatoes in darkness.
4. Can I save my own seed potatoes?
Yes - saving your own seed potatoes is possible and traditional in how to grow potatoes through successive seasons. Select the healthiest, best-formed potatoes from disease-free plants. Allow them to cure and store as normal, then plant them the following season. Over time, saved seed potatoes can develop disease problems - commercial certified seed potatoes are disease-tested and are worth using every few years to refresh your stock.
5. What is the difference between growing potatoes in raised beds versus in the ground?
How to grow potatoes in raised beds is generally more successful in most home gardens because the loose, stone-free growing mix produces better-formed tubers, the excellent drainage reduces disease risk, and hilling is simpler in the contained bed environment. In-ground growing requires more thorough soil preparation but works excellently in gardens with naturally loose, well-draining soil.
- Growing Vegetables — complete hub for growing all vegetables at home

Recent Articles


-
How to Grow Cabbage
Sep 15, 26 12:33 PM
 How to Grow Cabbage: The Complete Guide from Seed to Harvest. This complete guide covers everything you need to know about how to grow cabbage.
 -
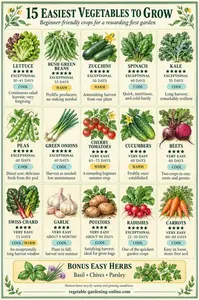
Easiest Vegetables to Grow: 15 Foolproof Crops for Beginners
Sep 15, 26 09:24 AM
 Easiest vegetables to grow for beginners - with advice on what makes each one easy, how to get started, and which vegetables are harder than they look.
 -
How to Grow Green Beans
Sep 14, 26 07:53 PM
 How to Grow Green Beans: The Complete Guide to Bush and Pole Beans. Green beans are one of the most forgiving crops a beginner can choose.
 -
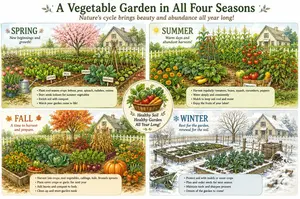
Seasonal Vegetable Garden
Sep 14, 26 05:38 PM
 Seasonal Vegetable Garden — Growing Food Through Every Season
 -
Overwintering Vegetables: Fall-Planted Crops for Early Spring Harvest
Sep 14, 26 05:35 PM
 Learn about overwintering vegetables like garlic, fava beans, and onions, planted in fall to sit through winter and reward you with an early spring harvest.
 -
Free Vegetable Garden Journal— Printable Downloads for Home Gardeners
Sep 14, 26 01:51 PM
 Download our free Vegetable Garden Journal — choose a full 16-page version or simpler 7-page journal. Track planting, harvest, & garden notes season by season.
 -
Free Vegetable Garden Cut and Paste Activities for Kids Ages 5-7
Sep 12, 26 09:13 PM
 Free printable vegetable garden cut and paste activities for kids ages 5-7. Build your own garden, match seeds to plants, and learn what grows where.