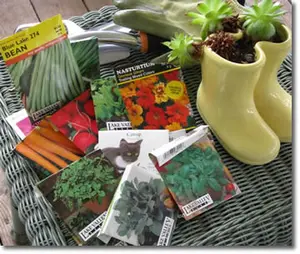
Growing Vegetables from Seed: The Complete Beginner's Guide

Growing vegetables from seed is one of the most rewarding experiences in gardening - and one that opens up a world of variety, flexibility, and satisfaction that buying transplants from a garden centre simply cannot match. When you are growing vegetables from seed, you are in control of the entire process from the very beginning: choosing exactly which varieties you want to grow, starting plants at precisely the right time for your climate, and nurturing seedlings from their first tiny leaves all the way to harvest. It costs a fraction of buying plants, and the results are often better.
Many gardeners assume that growing vegetables from seed is complicated or risky, especially for beginners. In reality, most vegetable seeds are remarkably forgiving. With the right timing, the right soil, adequate warmth, and enough light, growing vegetables from seed is straightforward - and the more you do it, the easier and more rewarding it becomes. This complete guide covers everything you need to get started.
Why Growing Vegetables from Seed Is Worth It

Vastly more variety
When you walk into a garden centre in spring, you will find perhaps five to ten varieties of tomato, three or four of pepper, and a handful of other common vegetables. When you are growing vegetables from seed from a good seed catalogue, you have access to hundreds of varieties of each crop - including heirloom and open-pollinated varieties with exceptional flavour, disease resistance, and characteristics suited to your specific climate. Growing vegetables from seed is the only way to access the full diversity of what is available to grow.
Significantly lower cost
A packet of 25 tomato seeds typically costs $3-5 and gives you more plants than most gardens could ever accommodate. A single tomato transplant at a garden centre costs $5-8. For gardeners growing multiple varieties or larger quantities, growing vegetables from seed saves substantial money every season.
Better plant health
Seedlings you have raised yourself from seed are often stronger and healthier than purchased transplants. You know exactly how they were grown, what soil they are in, and whether they have been hardened off properly. Purchased transplants are sometimes root-bound, under-hardened, or stressed from sitting in garden centre conditions for weeks before you buy them.
Earlier and longer harvests
Growing vegetables from seed indoors gives you a head start of six to eight weeks on the growing season. Tomatoes, peppers, and other slow-maturing warm-season crops started from seed indoors in late winter are ready to transplant the moment the last frost passes, giving you a significantly longer productive season than if you waited to buy transplants in spring.
Deep satisfaction
There is something uniquely satisfying about growing vegetables from seed that buying transplants simply does not provide. Watching a tiny seed germinate, nurturing it through its seedling stages, and eventually harvesting food from a plant you grew entirely from scratch is one of the most complete experiences vegetable gardening has to offer. According to the University of Minnesota Extension, growing vegetables from seed is an enjoyable and rewarding project for gardeners of every experience level.
Which Vegetables to Grow from Seed Indoors

Not every vegetable benefits from being started indoors. Some crops grow better when sown directly in the garden - they either grow so quickly that indoor starting gives little advantage, or they dislike having their roots disturbed during transplanting. Understanding which vegetables to start indoors and which to direct sow outdoors is one of the most important fundamentals of growing vegetables from seed successfully.
Always start these indoors
These crops have long growing seasons that exceed the outdoor frost-free period in most climates. Growing them from seed indoors is essential for a successful harvest:
- Tomatoes - need 6-8 weeks indoors; the most important indoor seed start for most vegetable gardeners
- Peppers - slow to germinate and grow; need 8-10 weeks indoors; require warm soil for germination (70-80°F)
- Eggplant - similar to peppers; 8-10 weeks indoors
- Celery and celeriac - very slow-growing; need 10-12 weeks indoors
- Leeks - slow-growing alliums that benefit significantly from an indoor start
Start indoors for earlier harvests
These crops can be direct sown outdoors but benefit from an indoor start because it gives you earlier harvests and extends the productive season:
- Broccoli, cabbage, cauliflower, Brussels sprouts, and kale - 4-6 weeks indoors for a spring crop; or 6-8 weeks indoors for a fall crop
- Cucumbers and zucchini - 3-4 weeks indoors; transplant carefully as they dislike root disturbance
- Summer and winter squash - 3-4 weeks indoors; same caution as cucumbers
- Lettuce and salad greens - 4 weeks indoors for the earliest spring harvest; can also be direct sown
- Basil and most herbs - 4-6 weeks indoors; basil needs warm temperatures to germinate
Always direct sow outdoors - do not start indoors
These crops either grow too quickly to benefit from indoor starting, or they have sensitive root systems that make transplanting difficult or impossible. When growing vegetables from seed for these crops, sow directly in the garden:
- Carrots, parsnips, and other root crops - tap roots make transplanting impossible
- Radishes - ready in 25 days; no advantage to indoor starting
- Beets - best direct sown, though some gardeners successfully start them indoors
- Peas and beans - fast-growing and dislike root disturbance; direct sow in place
- Corn - direct sow in blocks outdoors
- Spinach, arugula, and most salad greens - fast and easy from direct sowing
When to Start Growing Vegetables from Seed Indoors

Timing is the most critical factor in growing vegetables from seed successfully indoors. Start too early and you get large leggy seedlings that have been sitting in pots too long and are stressed by the time outdoor planting arrives. Start too late and you lose the advantages of indoor growing entirely. The right timing is based on your last frost date and the specific requirements of each crop.
How to calculate your seed starting dates
- Find your last spring frost date - this is the date after which frost is unlikely in your area. Use our free USDA Zone Chart to find your zone and last frost date.
- Find the recommended weeks to start indoors for each crop - this is usually printed on the seed packet as "start indoors X weeks before last frost date"
- Count backward from your last frost date by that number of weeks - that is your indoor sowing date for that crop
The most common mistake when growing vegetables from seed: Starting too early. A tomato seedling started 12 weeks before the last frost date will be large, root-bound, and stressed by transplanting time. Eight weeks is the sweet spot for tomatoes. Bigger is not better in seed starting - a compact, well-grown six-week-old tomato transplant will outperform a ten-week-old leggy one in virtually every case.
Seed starting timing guide
| Vegetable | Weeks Before Last Frost | Germination Temperature | Days to Germinate | Notes |
|---|---|---|---|---|
| Peppers | 10-12 weeks | 75-85°F (24-29°C) | 10-21 days | Slowest to germinate; start earliest |
| Eggplant | 8-10 weeks | 75-85°F (24-29°C) | 10-21 days | Needs warm soil; heat mat recommended |
| Celery / Celeriac | 10-12 weeks | 65-75°F (18-24°C) | 14-21 days | Very slow-growing; start early |
| Leeks and onions | 10-12 weeks | 65-75°F (18-24°C) | 7-14 days | Benefit greatly from early start |
| Tomatoes | 6-8 weeks | 70-80°F (21-27°C) | 5-10 days | Most popular indoor seed start |
| Broccoli / Cabbage / Kale | 4-6 weeks | 65-75°F (18-24°C) | 5-10 days | Cool-season; also sow for fall garden |
| Basil | 4-6 weeks | 70-80°F (21-27°C) | 5-10 days | Needs warmth; do not transplant until settled warm weather |
| Cucumbers | 3-4 weeks | 70-80°F (21-27°C) | 5-10 days | Fast-growing; do not start too early |
| Zucchini and squash | 3-4 weeks | 70-80°F (21-27°C) | 5-10 days | Very fast; use biodegradable pots to avoid root disturbance |
| Lettuce and salad greens | 4-6 weeks | 60-70°F (15-21°C) | 3-7 days | Very easy; also good for direct sowing |
What You Need for Growing Vegetables from Seed

Growing vegetables from seed indoors does not require expensive specialist equipment - but having the right basic supplies makes a significant difference to success rates. Here is what you genuinely need and what is optional.
Essential equipment
| Item | What to Look For | Approximate Cost |
|---|---|---|
| Seed starting trays or cells | Individual cells or small pots 2-3 inches diameter; plastic trays with drainage holes | $5-15 for a set |
| Seed starting mix | Fine, sterile, soilless mix specifically for seeds - NOT potting soil or garden soil | $8-15 per bag |
| Light source | Sunny south-facing window OR grow lights (strongly recommended - see below) | $0 for window; $30-80 for basic LED grow lights |
| Watering can with fine rose | A gentle spray that will not displace seeds or damage tiny seedlings | $10-20 |
| Labels and marker | Waterproof marker and plastic or wooden labels; it is easy to forget what is where | $3-5 |
Strongly recommended
- Seedling heat mat: A heat mat placed under seed trays raises soil temperature to the ideal germination range. Essential for growing vegetables from seed that need warm soil - peppers, eggplant, tomatoes, basil. Dramatically improves germination rates and speed. Cost: $20-40.
- Humidity dome or clear plastic cover: Placed over seed trays to retain moisture during germination. Remove as soon as seedlings emerge to prevent fungal disease. Often sold with seed trays.
- LED grow lights: Even a bright south-facing window rarely provides enough light for strong, compact seedlings in winter. Grow lights are the single biggest upgrade you can make when growing vegetables from seed indoors. LED shop lights hung 2-4 inches above seedlings for 14-16 hours per day produce compact, strong plants. Cost: $30-80.
The most important supply: the right soil mix
Never use regular potting soil or garden soil when growing vegetables from seed. Seed starting mix is specifically formulated to be very fine, light, sterile, and free-draining - perfect conditions for germination and tiny seedling roots. Standard potting soil is too coarse and heavy for delicate seedlings, and garden soil can harbour disease organisms that kill young plants. Always use a purpose-made seed starting mix.
Step-by-Step: How to Grow Vegetables from Seed Indoors

Follow these steps when growing vegetables from seed indoors and you will consistently produce strong, healthy transplants ready for the garden.
Step 1 - Fill your containers
Fill seed trays or cells to within half an inch of the top with moist seed starting mix. Do not pack it down hard - just firm it gently so there are no air pockets. The mix should be damp but not dripping wet when you fill. Pre-moistening the mix before filling is easier than trying to water dry mix from above after sowing.
Step 2 - Sow seeds at the right depth
The general rule when growing vegetables from seed is to sow at a depth of two to three times the diameter of the seed. Small seeds like lettuce and celery need only the lightest covering of mix - barely a dusting. Large seeds like cucumbers and beans go in half an inch to one inch deep. Most seed packets give the exact depth for that crop. A general guide:
- Tiny seeds (lettuce, celery, basil): barely cover with a dusting of mix or press lightly onto the surface
- Small seeds (tomatoes, peppers, kale, broccoli): cover with about one quarter inch of mix
- Medium seeds (cucumbers, zucchini, squash): cover with half an inch of mix
- Large seeds (beans, peas, corn, squash): one inch deep
Step 3 - Sow two to three seeds per cell
When growing vegetables from seed, sow two to three seeds per cell or small pot rather than just one. Not every seed will germinate - sowing multiple seeds ensures you get at least one plant from each cell. After germination, thin to the single strongest seedling by snipping the weakest ones at soil level with scissors. Never pull seedlings out - this disturbs the roots of the seedling you are keeping.
Step 4 - Label immediately
Label every tray or cell immediately after sowing - before you move on to the next variety. It is genuinely easy to forget which tray is which, especially when growing multiple varieties at the same time. Write the variety name and sowing date on each label.
Step 5 - Provide warmth for germination
Most vegetable seeds need warmth to germinate, particularly warm-season crops. Place trays on a heat mat if you have one, or on top of the refrigerator, or near a heat source. The ideal germination temperature for most vegetables is 65-80°F (18-27°C). Cool soil dramatically slows or prevents germination. Peppers in particular need warm soil - they will sit dormant in cold soil without germinating.
During the germination stage, seeds do not need light - they need warmth and moisture. Cover with a humidity dome or clear plastic to retain moisture and check daily.
Step 6 - Move to light the moment seedlings emerge
The most common cause of weak, leggy seedlings when growing vegetables from seed is insufficient light. The moment the first seedlings emerge, move the trays immediately to your strongest light source - directly under grow lights hung two to four inches above the seedlings, or in the sunniest south-facing window you have. Seedlings that do not get enough light immediately will stretch upward and become spindly and weak within days.
If using grow lights, run them for 14-16 hours per day on a timer. Raise the lights as seedlings grow to maintain the two-to-four inch distance.
Step 7 - Water correctly
Watering is the trickiest part of growing vegetables from seed indoors. Both overwatering and underwatering kill seedlings, and the line between them is narrower than with established plants.
- Water when the top of the soil mix feels dry to the touch - not on a schedule
- Water from below by setting trays in a shallow dish of water and allowing the mix to absorb moisture upward - this keeps foliage dry and reduces fungal disease
- Never let seedlings sit in standing water for more than an hour - drain excess after watering
- Use a very fine spray or gentle watering can rose when watering from above to avoid knocking over tiny seedlings
Step 8 - Thin to one seedling per cell
Once seedlings have their first true leaves (the second pair of leaves that appear, after the initial seed leaves), thin to one seedling per cell by snipping the weakest ones at soil level. Do not leave two seedlings in one cell - they will compete for space and both will suffer.
Step 9 - Pot up if needed
If your seedlings are ready to transplant outdoors but the weather has not cooperated, pot them up into a larger container to give their roots more room. A tomato seedling ready at eight weeks but facing a late frost can be potted up into a four-inch pot and grown on for another two to four weeks without becoming root-bound or stressed.
Step 10 - Harden off before transplanting
Hardening off is one of the most important and most skipped steps when growing vegetables from seed indoors. Seedlings grown indoors are not accustomed to outdoor conditions - wind, direct sun, temperature fluctuations, and rain. Moving them straight from a sheltered indoor environment to the garden causes transplant shock that can set plants back by weeks.
To harden off seedlings properly:
- Begin seven to ten days before your planned transplant date
- Day 1-2: Set seedlings outside in a sheltered spot with dappled light for one to two hours, then bring back inside
- Day 3-4: Increase to four hours, introducing some direct morning sun
- Day 5-6: Leave outside for six to eight hours including direct sun
- Day 7-10: Leave outside all day and bring in at night
- Final days: Leave outside overnight if no frost is forecast
After this gradual acclimatisation, seedlings are ready to transplant to their final position in the garden. Well-hardened transplants establish quickly and suffer minimal transplant shock.
Direct Sowing - Growing Vegetables from Seed Outdoors

Not all growing vegetables from seed happens indoors. Many of the most productive and easy crops are grown by sowing seeds directly in the garden where they will grow to maturity. Direct sowing is simpler than indoor seed starting and is often the better choice for the crops that suit it.
When to direct sow
The timing for direct sowing outdoors depends on whether a crop is cool-season or warm-season:
- Cool-season crops (lettuce, spinach, arugula, radishes, peas, carrots, beets) - direct sow two to four weeks before your last frost date. These crops germinate in cool soil and actually prefer cool growing conditions.
- Warm-season crops (beans, cucumbers, zucchini, corn) - direct sow after your last frost date when soil temperature has reached at least 60°F (15°C). Warm-season crops sown in cold soil will sit dormant, rot, or germinate slowly and weakly.
How to direct sow successfully
- Prepare the bed thoroughly before sowing - rake to a fine tilth, removing stones and large clods
- Sow at the correct depth as noted on the seed packet
- Sow more thickly than the final spacing - thin to the correct spacing after germination
- Keep the soil consistently moist until seeds germinate - the top inch of soil must not dry out completely
- Protect newly sown seeds from birds, which are adept at finding and eating freshly sown peas, beans, and corn - a simple row of fleece or netting is enough
Succession sowing for continuous harvests
One of the great advantages of growing vegetables from seed - especially fast crops like lettuce, radishes, and arugula - is the ability to succession sow. Rather than sowing all your seeds at once and getting a glut followed by nothing, sow small amounts every two to three weeks. This gives you a continuous supply of fresh crops throughout the season rather than a flood followed by a drought. A single packet of lettuce seeds sown in small batches every fortnight will keep a household in fresh salad for months.
Troubleshooting Common Problems When Growing Vegetables from Seed

Even experienced gardeners encounter problems when growing vegetables from seed. Here are the most common issues and how to resolve them:
Seeds not germinating
The most common causes are soil too cold, soil too dry, seeds too old, or seeds planted too deep. Check the germination temperature requirement - peppers and eggplant will sit in cold soil for weeks without germinating. Use a heat mat to bring soil temperature up to the required range. Check that the soil has stayed consistently moist - seeds need moisture throughout germination and will not recover if they dry out after beginning to germinate. If using old seeds, germination rates decline over time - try a germination test by placing seeds between damp paper towels in a warm spot and checking after the expected germination period.
Leggy, spindly seedlings
Long, thin, weak-stemmed seedlings are almost always caused by insufficient light. This is the single most common problem when growing vegetables from seed on a windowsill. Move seedlings as close to the light source as possible, or invest in a grow light. Seedlings need 14-16 hours of strong light per day - winter windowsill light in most climates is nowhere near sufficient for compact, healthy seedlings. Slightly reducing watering and ensuring good air circulation also helps prevent legginess.
Damping off
Damping off is a fungal disease that causes seedlings to collapse suddenly at the soil line - the stem rots and the seedling falls over and dies. It is caused by overwatering, poor air circulation, and contaminated soil or containers. Prevent it by using sterile seed starting mix, clean trays, and avoiding overwatering. Water from below rather than overhead. Ensure good air circulation around seedlings - a small fan on low is helpful. Remove any affected seedlings immediately to prevent spread.
Seedlings wilting after transplanting
Some wilting after transplanting is normal and does not necessarily mean the plant is dying. It is usually a sign of transplant shock - the plant's roots were disturbed and it is temporarily unable to take up water fast enough to supply the leaves. Shade newly transplanted seedlings for two to three days, water well, and avoid fertilising until they have recovered. Most seedlings recover completely within three to five days if they were adequately hardened off before transplanting.
Slow or uneven germination
When growing vegetables from seed, uneven germination is usually caused by inconsistent soil temperature across the tray, variable seed depth, or seeds from the same packet with different ages or quality. Ensure the heat mat heats the entire tray evenly. Use fresh seeds from reputable suppliers. A well-organised seed starting setup with consistent conditions will produce much more even germination than a casual approach.
Saving Your Own Seeds After Growing Vegetables from Seed

One of the most rewarding extensions of growing vegetables from seed is saving seeds from your own garden to plant the following year. Seed saving closes the growing cycle completely - from seed to plant to harvest to seed again - and over several seasons it naturally selects for varieties best adapted to your specific conditions.
Which seeds can be saved
Only open-pollinated and heirloom varieties produce seeds that come true to type - meaning the plants grown from saved seeds will closely resemble their parents. F1 hybrid varieties (which dominate most garden centre transplant offerings) do not come true from saved seed. When growing vegetables from seed from saved open-pollinated stock, you are participating in a seed-saving tradition that stretches back thousands of years.
- Easy seeds to save: tomatoes, peppers, beans, peas, lettuce
- Moderate difficulty: cucumbers, squash, kale, broccoli (risk of cross-pollination with related crops)
- Harder to save true to type: corn, brassicas (cross-pollinate readily with nearby varieties)
How to store saved seeds
Allow seeds to dry completely on the plant or off the plant before storing. Store in paper envelopes inside a sealed jar in a cool, dry, dark location. The University of Maryland Extension recommends storing surplus seeds in your freezer to maximise viability over multiple seasons. Label every packet with the variety name, source, and year saved. Most vegetable seeds remain viable for three to five years when stored correctly, though germination rates decline gradually over time.
Frequently Asked Questions About Growing Vegetables from Seed

Is growing vegetables from seed hard for beginners?
No - most vegetable seeds are genuinely easy to germinate and grow. Lettuce, radishes, beans, peas, and tomatoes are all very forgiving for first-time seed starters. The key is correct timing, the right soil mix, adequate warmth for germination, and enough light for seedlings. Start with two or three easy crops in your first season - a tray of tomatoes and lettuce is an ideal first seed starting project.
Do I need grow lights for growing vegetables from seed indoors?
Not strictly - but they make a very significant difference. A bright south-facing windowsill can work for easy crops in spring when day length is increasing. For growing vegetables from seed in late winter when days are short, or for crops that need high light levels like tomatoes and peppers, grow lights are strongly recommended. Basic LED shop lights are inexpensive and transform seed starting quality dramatically.
How do I know if my seeds are still viable?
Place ten seeds from the packet between two damp paper towels, fold, and place in a warm spot. Check after the number of days listed on the packet for germination. If fewer than five out of ten germinate (less than 50% germination rate), the seeds are too old or were stored poorly. Use a fresh packet. If six to eight germinate, the seeds are still usable but sow more thickly than normal to compensate for lower germination rates.
Can I use regular potting soil for growing vegetables from seed?
Regular potting soil is not ideal for growing vegetables from seed. It is too coarse and heavy for tiny seedlings and may contain bark or other materials that impede germination. Always use a purpose-made seed starting mix for germinating seeds. Once seedlings have their first true leaves and are being potted up into larger containers, regular potting soil or a potting mix is appropriate.
How many seeds should I sow per cell?
Sow two to three seeds per cell when growing vegetables from seed in individual cells or small pots. This gives you insurance against poor germination. Once seedlings emerge, thin to the single strongest seedling per cell by cutting weaker ones at soil level with scissors. Never pull seedlings out of shared cells - the root systems are often intertwined and you will disturb the seedling you want to keep.
When should I start feeding seedlings?
Seed starting mix contains little to no fertiliser by design - excess nutrients can harm germinating seeds. Begin feeding seedlings with a diluted liquid fertiliser (at half the recommended strength) when they have developed their first true leaves. By this stage the seedling has used up the nutrients stored in the seed itself and needs external feeding to continue growing well.
More Vegetable Gardening Guides

- How to Start a Vegetable Garden from Scratch
- Raised Bed Vegetable Gardening for Beginners
- Square Foot Gardening: The Complete Guide
- How to Grow Tomatoes from Seed to Harvest
- Fall Vegetable Garden Guide
- Companion Planting Chart for Vegetables
- No-Dig Vegetable Gardening
- Container Vegetable Gardening Guide
- Free Interactive Vegetable Garden Planner
- Free USDA Zone Chart - Find Your Planting Dates
Recent Articles
-
USDA Zone Finder - Find Your Vegetable Planting Dates | Vegetable-Gardening-Online.com
Jun 04, 26 10:43 PM
Find your USDA hardiness zone, last spring frost date, and first fall frost date by state and region. Free interactive zone finder from Vegetable-Gardening-Online.com. -
Growing Vegetables from Seed: The Complete Beginner's Guide
Jun 04, 26 10:07 PM
 Growing vegetables from seed is one of the most rewarding experiences in gardening - and one that opens up a world of satisfaction.
 -
Fall Vegetable Garden: The Complete Guide to Autumn Growing
Jun 04, 26 03:37 PM
 Complete guide to growing a fall vegetable garden.