- Home
- Free Garden Plans
- How to Plant Asparagus
How to Plant Asparagus: The Complete Guide to Growing Crowns and Long-Term Beds
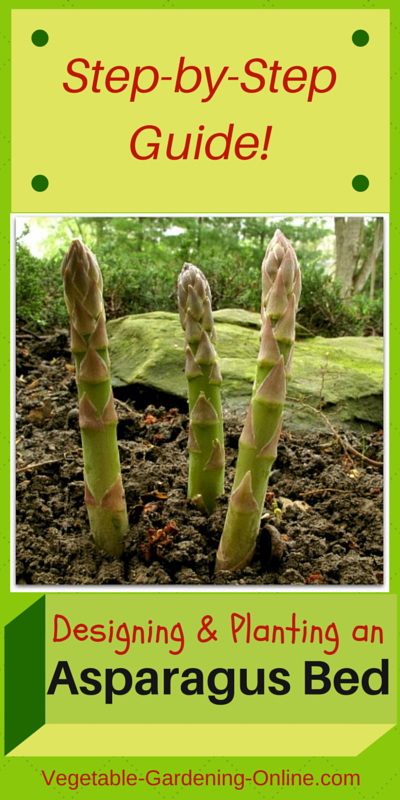
Learning how to plant asparagus is one of the longest-term investments you will ever make in a vegetable garden - and one of the most rewarding.
A well-planted asparagus bed can produce fresh spears every spring for fifteen to twenty years or more from a single planting.
No other vegetable offers that kind of return on a single afternoon of work. The catch, and the reason many gardeners hesitate, is patience: asparagus needs two to three years to establish before it can be harvested properly.
Get the planting right at the start, though, and that patience is repaid many times over.

This complete guide covers everything you need to know about how to plant asparagus successfully - choosing between crowns and seed, preparing the permanent bed, the trenching and spacing that gives roots room to spread for decades, and the waiting period that so often trips up first-time growers.
According to Utah State University Extension, asparagus thrives in full sun with fertile, well-drained soil enriched with organic matter, and a properly prepared bed can remain productive for twenty years or longer with only modest annual maintenance.
Source: Utah State University Extension - Growing Asparagus in the Garden
Crowns or Seed? Choosing Your Starting Point

The first decision in how to plant asparagus is whether to start from crowns or from seed.
This choice affects your timeline more than almost any other vegetable decision you will make, so it is worth understanding the trade-offs clearly before you buy anything.
Crowns are one-year-old asparagus roots, sold dormant and ready to plant directly into a prepared bed.
They are by far the most popular way to start an asparagus patch because they save an entire year compared to seed - you can expect a small, careful harvest in year two and a full harvest by year three.
Crowns are sold by mail order and at garden centers in late winter and early spring, usually in bundles of ten or twenty-five.
They should be planted as soon as possible after you receive them, kept slightly moist in the meantime, and never allowed to dry out or sit for weeks before planting.
Starting from seed costs less and some gardeners report healthier, more vigorous plants in the long run, but it adds a full extra year to the timeline - seed-grown asparagus typically takes three to four years to reach harvestable size, compared to two to three years from crowns.
If you choose seed, start it indoors twelve to fourteen weeks before your last frost date, soak seeds for a few hours beforehand to speed germination, and grow seedlings on until all frost danger has passed before transplanting them out to their permanent positions.
For almost all home gardeners, crowns are the more practical and more commonly recommended way to begin. The rest of this guide focuses primarily on planting from crowns, since this is how most people approach how to plant asparagus for the first time.
Crowns vs. seed comparison
| Factor | Crowns | Seed |
|---|---|---|
| Time to first light harvest | 2 years | 3-4 years |
| Time to full harvest | 3 years | 4-5 years |
| Initial cost | Higher per plant | Lower per plant |
| Availability | Garden centers and mail order, late winter/spring | Seed catalogs year-round |
| Best for | Most home gardeners; faster results | Patient gardeners; larger plantings on a budget |
Choosing an Asparagus Variety
 Commercial asparagus field.
Before you get to the practical steps of how to plant asparagus, it is worth spending a moment on variety selection, because asparagus is a long-term planting and the variety you choose will be in your garden for decades.
Most modern asparagus varieties sold for home gardens are all-male hybrids, and this is intentional. Female asparagus plants produce attractive red berries, but those berries divert energy away from spear production into seed development, meaning female plants are noticeably less productive than male ones. All-male varieties like Jersey Knight, Jersey Giant, and Jersey Supreme were specifically bred to eliminate this energy drain and consistently produce thicker, more abundant spears than older open-pollinated varieties.
Jersey Knight is the most widely recommended variety for home gardeners learning how to plant asparagus for the first time - it is vigorous, disease resistant, productive, and adaptable to a wide range of climates.
Purple Passion is a colorful heirloom-style option with sweet, tender, purple-tinged spears, though it is less productive than the Jersey series and includes both male and female plants.
Mary Washington is a classic older variety still available and widely planted, though it has largely been surpassed in productivity by the newer all-male hybrids. Whichever variety you choose, the underlying steps for how to plant asparagus crowns remain the same.
Choosing the Right Site for Planting Asparagus
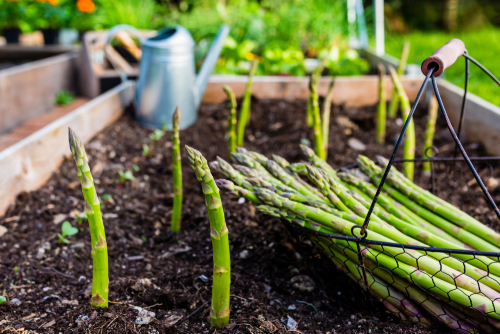
Site selection is one of the most consequential decisions in how to plant asparagus, because once a bed is established it will occupy that spot for fifteen to twenty years or more. This is not a crop you move or rotate like lettuce or beans - choose carefully the first time.
Asparagus needs full sun - six to eight hours of direct sunlight daily - to produce well over the long term. It also grows tall, ferny foliage that can reach four to five feet by midsummer, so position the bed where this foliage will not shade out shorter neighboring crops. The edge or back of the vegetable garden is the traditional and most practical position, since an asparagus bed will not be tilled, dug, or rotated the way the rest of the garden is each year.
Good drainage matters enormously when working out how to plant asparagus successfully. Asparagus roots are sensitive to waterlogged soil, and a bed that sits wet through winter and spring is far more prone to crown rot and reduced vigor. If your native soil is heavy clay or drains poorly, a raised bed is one of the best solutions - it gives you complete control over the growing medium and eliminates drainage problems before they start.
Because the bed is permanent, it is worth investing in a well-built raised bed specifically for asparagus rather than trying to amend poor native soil indefinitely. This is one site decision in how to plant asparagus that is genuinely worth getting right the first time.
Preparing the Asparagus Bed Soil

Thorough soil preparation before planting is arguably the single most important step in how to plant asparagus for a long, productive bed life. Because the bed will not be dug or amended deeply again for two decades, this is genuinely a once-in-a-generation opportunity to get the soil right.
Asparagus prefers a near-neutral soil pH between 6.5 and 7.5. Test your soil before planting and add lime if it is significantly more acidic than this range - correcting pH now is far easier than trying to adjust it later in an established bed where digging would damage the crowns. Work generous amounts of compost and aged manure into the planting area, along with a phosphorus-rich amendment like bone meal, which supports the strong root development that asparagus depends on for decades of production.
The soil should be loosened to a depth of twelve to fifteen inches before planting - deeper than almost any other vegetable bed preparation. This depth allows the asparagus root system to establish fully without hitting compacted soil or buried rocks that would distort root growth. Remove all stones and break up any compacted layers thoroughly. This is hard, physical work, but it is the foundation that determines how well your asparagus performs for the rest of its long life in your garden.
How to Plant Asparagus Crowns Step by Step
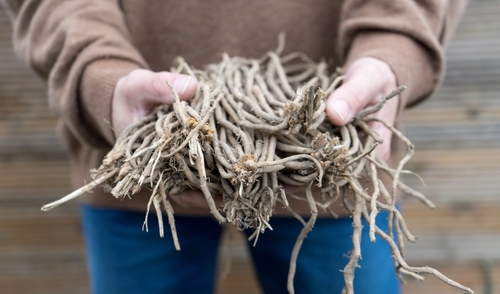
With the site chosen and soil prepared, the actual process of how to plant asparagus crowns is straightforward. The steps below follow the trenching method recommended by university extension services and are the most reliable approach for a long-lived, productive bed.
Dig a trench twelve to eighteen inches wide and six to eight inches deep, running the length of your planned bed. If you are planting more than one row, space the trenches at least three to five feet apart - asparagus plants spread wide both above and below ground over the years, and crowded rows compete for light, water, and nutrients. Plant at the shallower end of the depth range (six inches) in heavier soils, and deeper (eight inches) in light, sandy soil and in colder climates where extra depth offers winter protection.
Build a two to three inch ridge of soil running along the center of the trench floor. Soak the crowns briefly in lukewarm water before planting if they have dried out at all in shipping or storage. Place each crown on top of the ridge with its roots spread out evenly in all directions like the spokes of a wheel, and the central bud - which looks like a small pointed stem - facing upward. Space crowns twelve to eighteen inches apart along the trench.
Cover the crowns with two to three inches of soil, leaving the rest of the trench open for now. As the season progresses and new shoots push up through this initial covering, gradually backfill the trench with more soil every few weeks, always leaving the newest growth tips just above the surface.
Continue this gradual filling process until the trench is completely level with the surrounding bed by mid-to-late summer. This progressive backfilling is one of the most distinctive parts of how to plant asparagus compared to other vegetables, and it is the technique that protects developing crown buds while still allowing strong upward growth.
Asparagus crown planting at a glance
| Element | Recommendation |
|---|---|
| Trench width | 12-18 inches |
| Trench depth | 6-8 inches (shallower in heavy soil, deeper in sandy soil/cold climates) |
| Spacing between crowns | 12-18 inches |
| Spacing between rows | 3-5 feet |
| Initial soil covering | 2-3 inches over the crown |
| Best planting time | Early spring, when soil reaches about 50-55°F |
When to Plant Asparagus
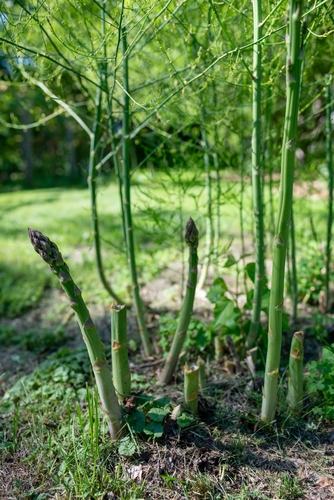
Timing matters when working out how to plant asparagus, though the window is more forgiving than for many vegetables since crowns are dormant and not actively growing at planting time.
The right time to plant is early spring, once the soil can be worked and has warmed to roughly 50 to 55 degrees Fahrenheit, and before the crowns break dormancy and begin actively sprouting.
In most of the continental US this means planting sometime between late March and mid-May, with northern gardens planting later in that window and southern gardens earlier. Use our free interactive zone finder to get a sense of your typical spring soil-warming timeline before ordering crowns, since suppliers often ship them at a specific time tied to your region rather than on demand.
Avoid planting into cold, waterlogged spring soil. Asparagus crowns sitting in saturated, cold ground are vulnerable to rot before they ever get a chance to establish. If a wet spell delays your planting after crowns arrive, keep them in a cool location with their roots covered by slightly damp peat moss or sand rather than planting them into unsuitable conditions.
The Waiting Period: Why Asparagus Takes Years to Establish
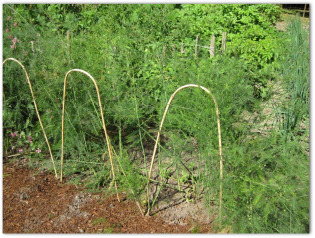
This is the part that catches many first-time growers by surprise: you cannot harvest a meaningful crop in the first year, and only a very light, careful harvest in the second. Understanding why this waiting period exists - and resisting the temptation to cut spears too early - is essential to building a bed that will reward you for decades.
In the first year after planting, do not harvest any spears at all, no matter how tempting the first thin shoots look.
The plant needs every bit of energy from those early spears to grow into ferny foliage above ground and to build a larger root and crown system below ground. Cutting spears in year one significantly weakens the developing plant and can set back productivity for several years afterward.
In the second year, a very light harvest is acceptable - most guidance recommends limiting this to two to three weeks total, cutting only the thickest spears and leaving thinner ones to grow into foliage.
By the third year, with crowns now well established, you can extend the harvest window to six to eight weeks, which becomes the standard annual harvest period for a mature bed going forward.
This gradual ramp-up is the single most important discipline in how to plant asparagus successfully and is the difference between a bed that produces abundantly for twenty years and one that is permanently weakened by impatient over-harvesting in its early years.
Caring for Young Asparagus Plants

Once you have worked through the planting steps, the next phase of how to plant asparagus successfully is caring for the bed through its first few establishment years, when good habits set the pattern for decades of productivity.
Keep the bed consistently weed-free, particularly in the first two years. Young asparagus competes poorly with weeds for water, light, and nutrients, and a weedy bed in its establishment phase can take years longer to reach full productivity than one that is kept clean. A three-inch layer of weed-free straw mulch helps suppress weeds, retains soil moisture, and has the useful side effect of keeping the soil slightly cooler in spring, which delays spear emergence just enough to reduce the risk of damage from a late frost.
Water deeply and consistently through the first growing season, since newly planted crowns have not yet developed the deep root systems that make mature asparagus relatively drought tolerant. Once established after two to three years, asparagus becomes quite resilient and needs supplemental watering mainly during extended dry spells.
Feed the bed with a balanced or phosphorus-rich fertilizer at planting time, and again with a nitrogen-rich feed after the harvest period ends each year once the bed matures - this supports the vigorous fern growth through summer that builds the energy reserves for next year's spears.
Side-dressing with compost annually is one of the simplest and most effective ways to maintain a productive asparagus bed over the long term without disturbing the established roots.
Harvesting Asparagus
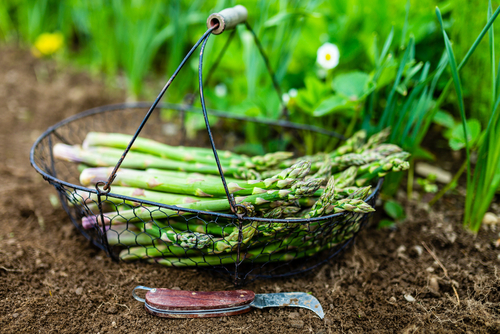
Once your bed has matured past the patient early years of waiting for establishment, harvesting becomes one of the simplest and most satisfying tasks in the vegetable garden each spring.
Harvest spears when they are five to nine inches tall, snapping or cutting them off at or just below soil level. Many experienced growers prefer snapping spears by hand rather than cutting with a knife, since this naturally breaks the spear at its tender point and avoids the risk of nicking nearby crown buds that a knife blade can cause. Morning is the best time to harvest, when spears are crisp and snap cleanly.
During peak season, check the bed daily - asparagus grows remarkably fast in warm spring weather, sometimes several inches in a single day, and spears left too long become tough and woody.
Harvest a mature, established bed for six to eight weeks each spring, then stop and allow all remaining and new spears to grow on into tall ferny foliage for the rest of the season. This foliage looks unkempt compared to the rest of the vegetable garden, but it is doing essential work, photosynthesizing and sending energy back down into the crowns to fuel next year's harvest.
Resist any urge to cut it back early - leave it standing until it yellows and dies back naturally in fall, then cut it down and clear it away to reduce the carryover of pests and disease into the following season.
Asparagus harvest timeline by bed age
| Year After Planting Crowns | Harvest Guidance |
|---|---|
| Year 1 | No harvest. Let all spears grow into foliage to build the root system. |
| Year 2 | Very light harvest, 2-3 weeks maximum. Cut only the thickest spears. |
| Year 3 | Extend to a 6-8 week harvest window. Bed is now considered established. |
| Year 4 onward | Standard annual 6-8 week harvest each spring for the life of the bed. |
Common Problems When Planting and Growing Asparagus

Even with careful attention, a few common problems are worth knowing about in advance so you can recognize and address them quickly. Most issues that affect a young bed trace back to one of the same handful of causes covered throughout this how to plant asparagus guide: poor drainage, impatient early harvesting, or insufficient feeding.
Thin, spindly spears in an established bed usually point to overcrowding, insufficient feeding, or a bed that was harvested too hard or for too long in its early years. Reducing harvest duration for a season or two and feeding generously with compost and a balanced fertilizer typically restores spear thickness over time.
Asparagus beetles are the most common pest, recognizable as small spotted beetles in brown or reddish tones, with yellowish caterpillar-like larvae that feed on spears and the ferny summer foliage. Hand picking adults and larvae is effective for small beds. In larger plantings, an insecticidal soap or spinosad-based organic spray applied directly to affected foliage controls populations without harming the broader garden ecosystem.
Crown rot, caused by waterlogged or poorly drained soil, is the most serious threat to a long-term asparagus bed and the main reason site selection and soil preparation deserve so much attention before planting. There is no effective treatment once rot sets in - prevention through good drainage and avoiding wet, low-lying sites is the only reliable defense.
Weeds competing with young plants in the first two years is less a disease than a management issue, but it is one of the most common reasons a new asparagus bed under-performs. Consistent mulching and hand weeding through the establishment period pays off for the entire productive life of the bed.
Frequently Asked Questions About How to Plant Asparagus

1. How many asparagus crowns should I plant?
A common guideline is ten to twenty crowns per person who enjoys eating asparagus, since each established crown produces roughly half a pound of spears per year. A family of four that loves asparagus might plant forty to sixty crowns, while a household that just wants the occasional spring treat could be perfectly happy with ten to fifteen.
2. Can I move an established asparagus bed?
Asparagus does not transplant well once established, and digging up mature crowns to relocate them usually sets the plants back significantly, sometimes by several years. This is exactly why site selection before planting deserves so much care - choose the permanent location the first time rather than planning to move the bed later.
3. Why didn't my asparagus crowns come up the first year?
Some thin, slow growth in the first season is completely normal as crowns focus energy on establishing roots rather than top growth. If nothing emerged at all, the most likely causes are crowns that dried out before or during planting, planting too deep in cold or heavy soil, or waterlogged conditions that caused rot. Revisit the how to plant asparagus steps above and check that crowns were planted at the recommended depth and that the bed drains well.
4. Do I need male and female asparagus plants to get a harvest?
No. Unlike many fruiting plants, asparagus does not need a male and female pair to produce harvestable spears. In fact, most modern varieties recommended for home gardens are all-male hybrids specifically because male plants put all their energy into spear production rather than diverting it into seed and berry development on female plants.
5. How long will an asparagus bed keep producing?
A well-sited, well-prepared asparagus bed regularly maintained with annual mulching, weeding, and feeding can remain productive for fifteen to twenty-five years. Some long-established home garden beds are known to keep producing for even longer, making this one of the few vegetables that can genuinely be considered a multi-decade investment rather than an annual crop.
More Vegetable Growing Guides
- Growing Vegetables — complete hub for growing all vegetables at home

Recent Articles


-
How to Ripen Green Tomatoes Indoors
Oct 14, 26 04:11 PM
 Ripen green tomatoes indoors with a simple newspaper method. Learn when to pick, where to place them, and how to keep fresh ripe tomatoes coming for weeks.
 -
Free Vegetable Garden Printables — Downloads for Every Gardener
Oct 14, 26 12:29 PM
 Browse our complete library of free vegetable garden printables, from planning worksheets and growing charts to kids' activities, all free to download & print.
 -
Free Printable Return Address Labels: Garden and Christmas
Oct 14, 26 12:11 PM
Free printable return address labels with watercolor garden and Christmas designs. Type your address, pick a picture, and print on Avery 5160 label sheets. -
Free Printable Gift Stickers: Christmas and Garden Designs
Oct 14, 26 11:58 AM
Free printable round gift stickers with watercolor garden and Christmas pictures. Add a message or To and From, and print on 2-inch labels at home. -
Free Printable Place Cards: Thanksgiving, Christmas, and Parties
Oct 13, 26 01:46 PM
Free printable place cards for Thanksgiving, Christmas, birthdays, tea parties, and garden parties. Type your guest list, pick a picture, and print. -
Free Printable Garden Stationery: Gardening Letter Paper & Note Cards
Oct 13, 26 09:58 AM
Free printable garden stationery: watercolor letter paper, lined and unlined, plus folded note cards with garden, fall, and Christmas scenes. Print at home. -
Free Printable Canning Jar Labels: Regular, Wide Mouth & Jam Jars
Oct 12, 26 04:01 PM
 Free printable canning jar labels for regular and wide mouth lids and jam jars: tomatoes, salsa, pickles, green beans, peaches, pears, and jam.