Wooden Garden Fences
DIY Projects

Below are pictures and examples of wooden garden fences for do-it-yourself projects.
Build a simple and inexpensive wood fence for your vegetable garden as a weekend project using just a few basic tools!
A wood fence stands to mark the property line, or it may be used to separate areas that have different uses.
Wooden fencing can be an attractive way to shield your garden from prying eyes, animals, and other pests.
At the end of the gardening season, most vegetable gardens just aren't that attractive anymore, but a cute wooden fence will always look great.
Whichever the intended purpose, wooden fences become a part of the landscape design and can be pleasing to the eye as well as functional.
Though stone, masonry, and wire are often used to build walls and fences, wood is by far the most popular building material.
It is easy to work with, relatively cheap, and possesses a natural beauty.
It can be adapted to many different kinds of fences, from a low, open screen that helps to divide an area within the land, to a tall, solid barrier that provides security or blocks an unpleasant view.
Vegetable Garden Fence Ideas

- A wooden fence is most often used as a divider between adjoining
properties, or areas of a backyard.
- However, wooden fences can be used
to modify the climate of your garden lot. For example, a tall fence on
the west side of the house will provide late afternoon shade that keeps
both your home and any plantings
in the location cool.
- A louvered fence serves as a windbreak; it reduces the force of the wind by diffusing it (wind will flow over a solid fencing).
- Wooden
garden fences make an attractive backdrop and can provide sturdy
support for plants.
- It is important to select a type of fence that is both functional and contributes to the harmony of the scenery. For instance, the combination of stone base, picket fence, and overhanging foliage is eye catching.
Materials Needed for Building a Wooden Fence
The basic materials for wooden fences include wood, hardware, and preservative coatings.
You will also need gravel, and concrete mix for installing posts.
The best woods to use for fences are redwood and cedar; both have natural resistance to rotting.
A well-built redwood fence will last for generations with little maintenance necessary.
Redwood is also one of the most attractive woods for fences.
Its only disadvantage is its price, and cedar is priced high as well!

- If you have a large garden site to fence, pine boards can be used for attractive but cheap garden fences.
- However, one disadvantage is that
pine is susceptible to rot and will need repeated treatments
with wood preservatives.
- Even after treatment, less expensive wood
cannot be expected to hold up as long as cedar or redwood.
- Nevertheless,
consider all your options before purchasing fence materials.
- Nails,
screws, angle irons, and metal straps used in fencing should all be rust and corrosion resistant.
- Stainless steel fasteners are best.
Planning a Garden Fence
The first step when planning wooden garden fences, is to determine local building codes regarding fences.
Most cities have restrictions on height and distance from the street or property line.
Also, consult your neighbor beforehand, if the fence is to be built on or near a property line.
Use a plot plan of your property to sketch out the layout of the fence.
Then use the drawing and measurements to determine how much lumber is needed.
Construction of Basic Wooden Garden Fences
- Fence posts should be sunk as least two feet in the ground.
- A general
rule of thumb is that 2/3 of a post is above ground, 1/3 below.
- Use a post-hole digger to make holes about three times as wide a the posts.

- Put a few inches of coarse gravel in the bottom of hole to help water drain easily and keep the post from rotting.
- After setting the post, fill in around the hole with a relatively dry mix of concrete.
- Use a level to check the vertical alignment while the cement is still wet.
- The post should be perfectly straight, uniform front and side.
- Let the posts set for a day or two.
- Then attach and level the horizontal stringers.
- The final step is to attach the fence material to the stringers.
The exact method will depend on what kind of wooden garden fences you are constructing.
Wooden Garden Fences to Vegetable Gardening
You Might Also like to Read:
Wooden Garden Fences to Planning a Vegetable GardenRecent Articles
-
Growing Dill In a Backyard Vegetable Garden
Nov 20, 18 11:40 PM
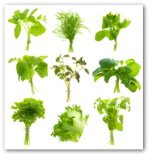 Easy tips for growing dill in a home vegetable, kitchen, or herb garden. Learn how to plant, grow, care for, and harvest dill plants when backyard vegetable gardening.
 -
Vegetable Garden Pictures to Help Plan Your Garden
Nov 20, 18 09:53 AM
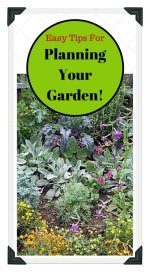 Vegetable garden pictures and videos to help you get started planting a garden. Gardening pictures can help you plan your garden whether a raised bed, container, or traditional backyard home garden.
 -
Vegetable Gardening Planting Times, Zone Chart, and Guide for When to Plant
Nov 20, 18 09:51 AM
Use our free zone chart and guide for vegetable gardening planting times, to plan your next garden. Whether planting seeds or transplants, learn when to start.